
LiveTheVanLife · Practical Vanagon care
VW Vanagon Window Seal Replacement:
Leaks, Rust and Installation
A dry cabin starts with the right diagnosis, sound metal and a properly seated seal. Here is how to plan the job—from the first damp carpet to the final water test.
By LiveTheVanLife Restorations · October 22, 2026 · Vanagon / T3 / T25

Replacing a Vanagon window seal can stop a leak—but only if the glass, rubber and body opening can seal against one another. Hardened rubber is one possibility. Corrosion beneath the rubber, a folded lip, an incorrect seal or water arriving from somewhere above the window can produce very similar symptoms.
The sensible sequence is to locate the leak, identify the window assembly, remove the glass safely when needed, repair the opening, fit the correct seal and test the result. A neat-looking bead of sealant around the outside tells you little about the metal underneath.
01 / Start with evidence
Find where the water enters.
A damp front footwell is a reason to investigate, not proof that the windshield seal is the only fault. Water can travel behind trim and emerge away from its entry point. Look at the windshield perimeter, body seams and nearby penetrations, including the wiper-spindle area. At the rear, separate the hatch-glass seal from the hatch-to-body seal and other openings above it.
Begin with a dry van. Lift removable mats and check the padding underneath; a dry carpet surface can hide wet insulation. Photograph staining and corrosion before cleaning, then have one person watch inside while another applies a small, gentle stream of water outside. Start at the lowest suspect area, pause and observe, then move progressively higher. Stop when you reproduce the leak. Flooding the whole roof at once makes the result harder to interpret.
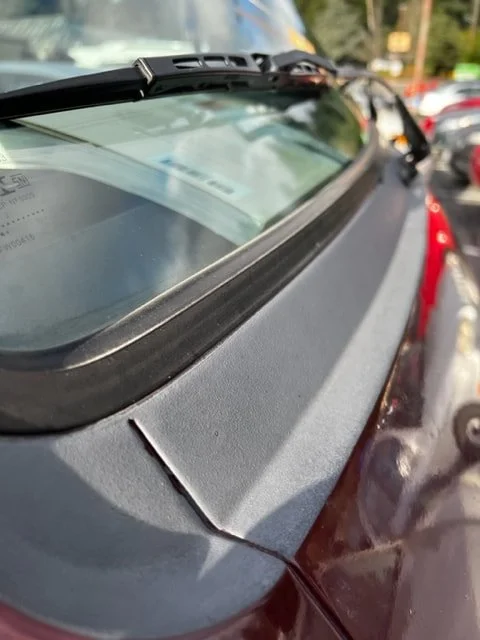
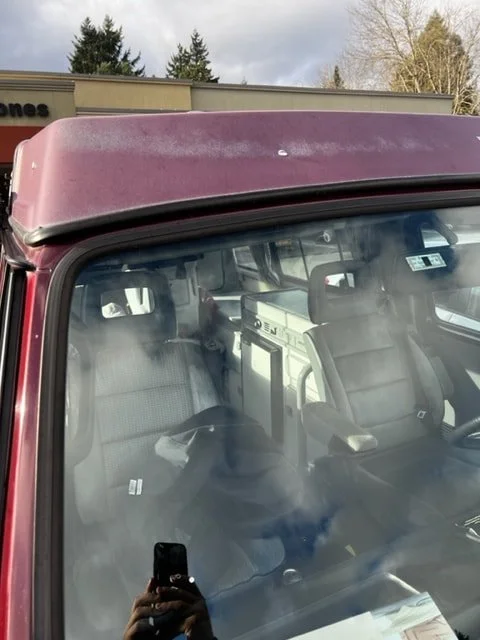
Read the symptoms carefully.
| What you find | What to investigate | Useful next step |
|---|---|---|
| Water along a fixed window’s inside edge | Glass-to-rubber and rubber-to-body contact; tucked lips; nearby corrosion. | Isolate the affected section with a gentle water test. |
| Water in a sliding-window track | Track contamination, designed drain outlets, internal seals and frame joints. | Identify the assembly and inspect its drainage before ordering an outer gasket. |
| Wet front door card or door bottom | Window scrapers, door drains and the moisture barrier behind the trim. | Inspect the door as a drainage system; do not block its outlets. |
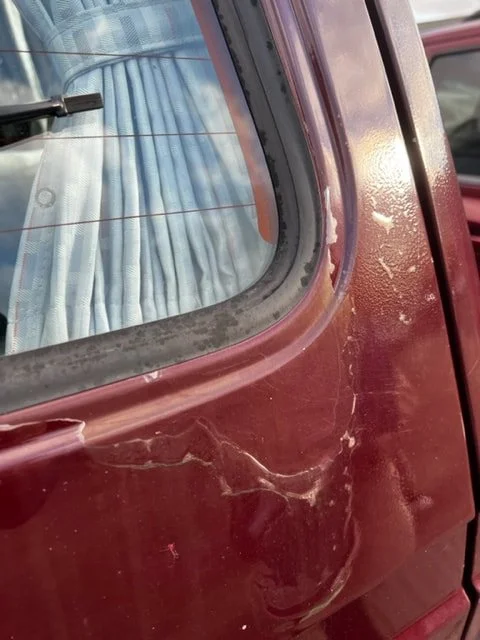
| Bubbling paint or staining beside the seal | Corrosion may extend under the rubber. | Plan for glass removal and an assessment of the exposed opening. |
| General misting without a repeatable rain leak | Condensation and retained interior moisture. | Dry and ventilate the cabin, then test for a separate leak. |
Keep test water away from exposed electrics. If water is already reaching wiring or the fuse area, address that promptly and arrange an electrical inspection where necessary.
02 / Order for the actual window
“Window seal kit” can mean several different jobs.
Before ordering, record the van’s year and market, the window position, the side, whether the glass is fixed or part of a framed assembly, and whether you want to retain the bright trim. Check the fitted parts as well as the VIN: forty years of repairs and conversions can change what is on the van.
Windshield, fixed sides and hatch glass
Each location needs its own correct profile and dimensions. A windshield gasket is not a rear-hatch gasket. Confirm the manufacturer’s fitment for the exact opening rather than assuming every side window uses the same rubber.
Opening and door windows
An outer sliding-window gasket does not renew the seals inside the frame. Front door roll-up kits cover a different group of parts again; wing-window seals and door-to-body seals may be separate purchases.
For example, GoWesty’s roll-up window kit lists a top/rear felt channel, a front felt channel and an outer scraper, with side-specific choices and an optional inner scraper. Read the contents of any kit before treating it as a complete door reseal.
Grooved or grooveless?
The groove in the original fixed-window seal accepts the bright decorative insert. GoWesty explains that this trim is cosmetic; removing it does not disable the seal. A grooveless replacement gives a plain black finish. If preserving the original appearance, confirm compatible trim and fitting order before assembling the glass. Front door bright trim is a different arrangement and should not be treated as the same removable plastic insert.
03 / The work hiding under the rubber
Inspect the opening before fitting fresh rubber.
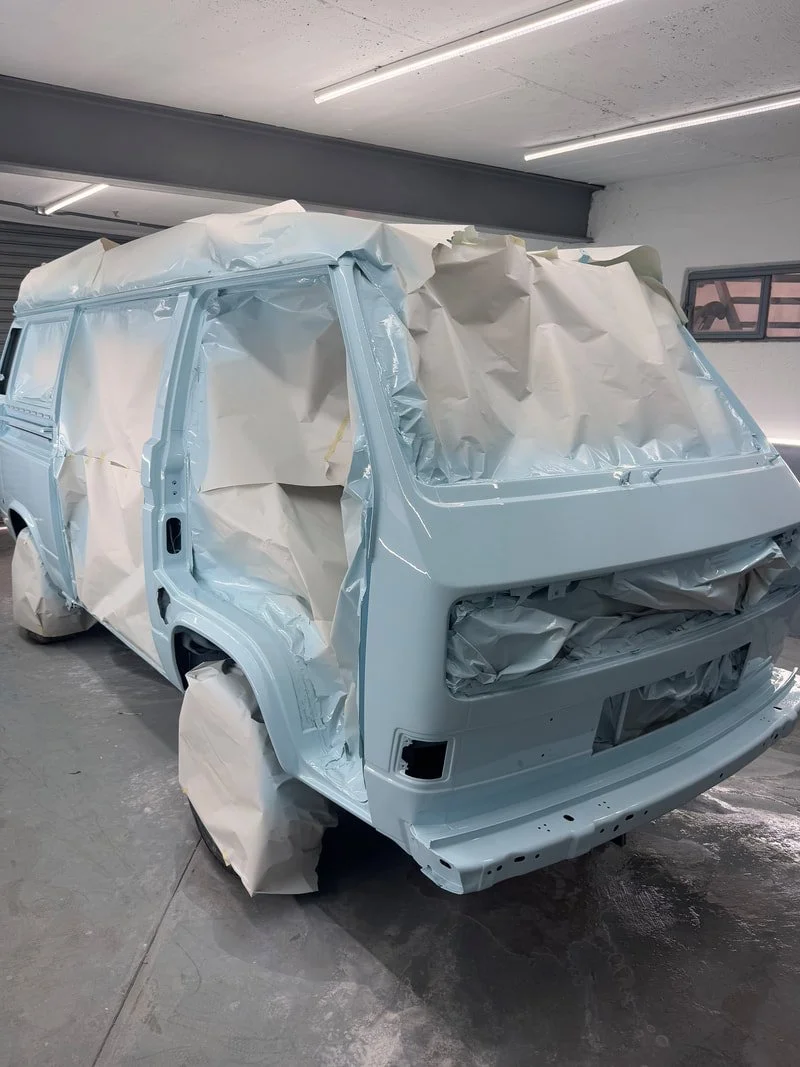
The narrow metal edge captured by the gasket is often called the flange or pinch weld. It must be sound, correctly shaped and protected. Rust scale, lifted paint, old sealer and uneven previous repairs can prevent consistent contact. A new gasket cannot rebuild a missing edge.
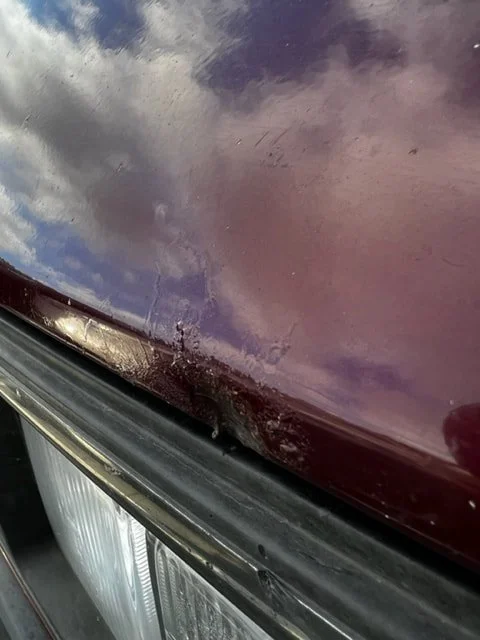
Surface corrosion, pitting or perforation?
Light surface corrosion may be repairable by removing corrosion, preparing the metal and restoring a compatible protective coating system. Deep pits need closer examination: the remaining thickness and the condition of the back of the flange matter. Holes, soft metal, split seams or a missing lip call for body repair before the glass goes back in.
Filler, fiberglass and rust converter should not be treated as substitutes for a sound flange where metal has been lost. Repair the opening’s shape as well as its surface. Too much material, a distorted corner or a rough weld can make installation difficult and load the glass unevenly.
Inspect the entire perimeter once accessible, including the lower corners and concealed backside where practical. Complete metalwork and refinishing with the glass protected away from grinding and welding. Follow the coating manufacturer’s preparation, compatibility and cure requirements; there is no universal “paint it today, fit glass tomorrow” interval.
On a full restoration, coordinating window removal with bodywork and paint gives the opportunity to address what the rubber conceals. Our paint and bodywork guide explains how to start a project conversation. A photo estimate should always leave room for discoveries after disassembly.
04 / Fit the assembly, without forcing it
How a rubber-mounted window goes in.
Large glass is a two-person handling job. Plan a padded work surface, clean gloves, eye protection, paint protection, plastic glazing tools, a suitable smooth cord and a lubricant approved for the rubber and coatings. Confirm the seal supplier’s instructions and have a dry, secure place for the van if rust changes the schedule.
Removal is part of the risk.
Have the installer assess cracks, chips and edge damage before committing to reuse. Even apparently serviceable glass can break during removal. When the old rubber is being discarded, a controlled cut-out can reduce the force needed, but careless cutting can damage glass, paint, trim or wiring. Do not pry against a glass edge with a screwdriver or try to kick the windshield out. Support the assembly throughout removal. Protect rear-window heater connections where fitted.
Clean the glass edge and check the new gasket before installation. Do not carry on if the glass is damaged, the rubber appears wrong or the opening still needs repair. GoWesty recommends professional installation and notes that warmed rubber is easier to fit. A comfortably warm working environment is preferable to concentrated heat on one spot.
The basic rope-in sequence
- Fit the correct gasket around the glass in its intended orientation. Identify the body-flange channel and any separate trim groove.
- Place a suitable smooth cord in the body channel, leaving overlapping ends accessible inside the vehicle. Follow the seal maker’s trim and lubricant instructions.
- With a helper supporting the assembly outside, center it in the opening. Ensure the outer lip has not folded underneath.
- From inside, pull the cord gradually so the inner lip passes over the flange. Work in short sections while the helper supports near the working area. Avoid pressure on the center of the glass.
- Stop if resistance increases sharply. Check alignment and the lip instead of pulling harder. Inspect the full perimeter when seated and correct tucked rubber with suitable plastic tools.
General method: Heritage Parts Centre’s seal-fitting guidance. Exact cord size, starting point and assembly details depend on the supplied seal and window.
05 / Choose the right product
Does a Vanagon window seal need sealant?
Follow the seal manufacturer’s and installer’s instructions for the particular assembly. Where a bedding compound is specified, use a product intended for rubber-gasket automotive glazing and compatible with the paint and rubber. Decide where it belongs before installation; spreading a visible bead around the outside is not the same as bedding the correct interface.
3M describes its 08509 bedding and glazing compound as a pliable, non-hardening, water-resistant sealer for the interface between windshield rubber and the car body. That describes a product category; it does not mean every Vanagon seal must receive that product in every groove.
A rubber-mounted window and a modern bonded windshield use different installation systems. Do not substitute structural urethane, general-purpose adhesive or household bathroom silicone without an applicable manufacturer-approved procedure. Lubricant is also separate from sealant: use only a compatible fitting aid, and do not assume oil, penetrating spray or dish detergent is suitable.
If the opening is corroded, the seal is incorrect or the lip is rolled under, fix that cause. Extra compound cannot turn a defective mechanical fit into a reliable repair. Keep designed drain paths clear.
06 / Prove the repair
The job ends with a water test and a dry interior.
After the assembly is correctly seated and any products have reached their required test-ready condition, repeat the same gentle, staged water test used for diagnosis. Observe the inside edge, the lower corners and the areas previously wet. Avoid a pressure washer: it is a poor substitute for a controlled rain-leak test.
- Check that the gasket lies evenly against glass and body on both sides, with no folded corners or exposed flange.
- On sliding windows, check closing, latch engagement and the assembly’s intended drainage. On door glass, check smooth travel without abnormal force.
- Inspect behind accessible trim and beneath mats. Dry saturated padding separately rather than trapping it beneath the carpet.
- Recheck after the next rain and after normal use. A repeat leak is a reason to revisit the diagnosis, not automatically add more sealer.
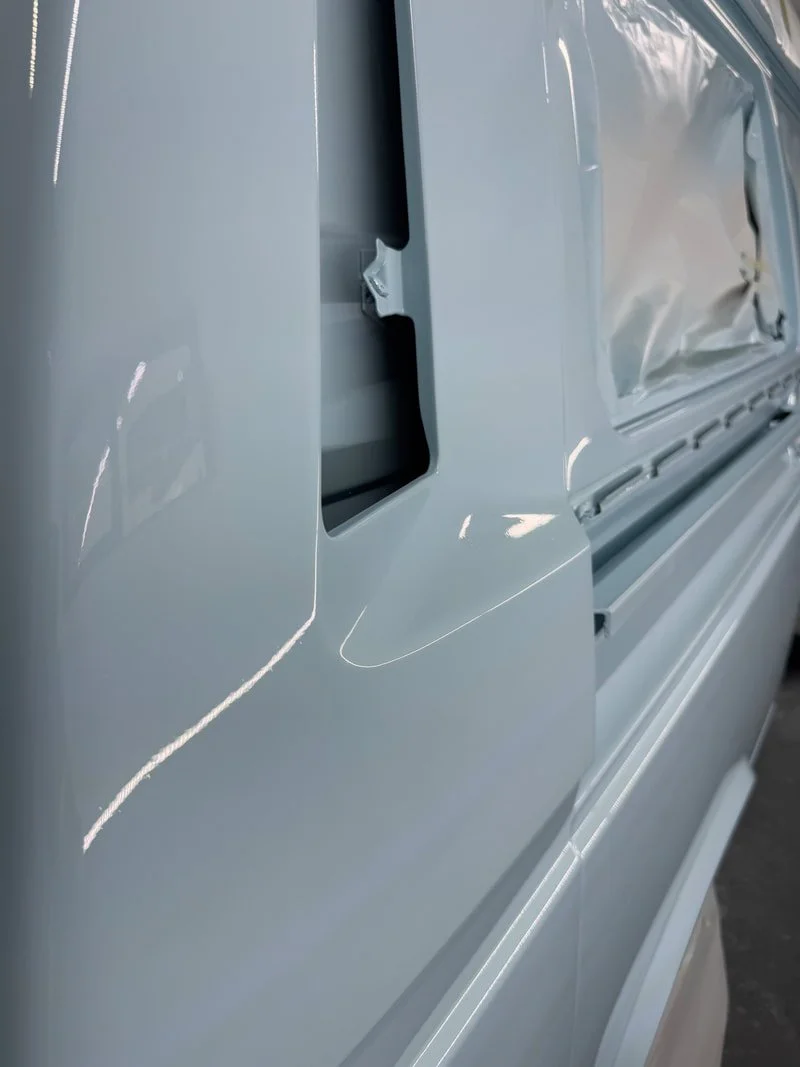
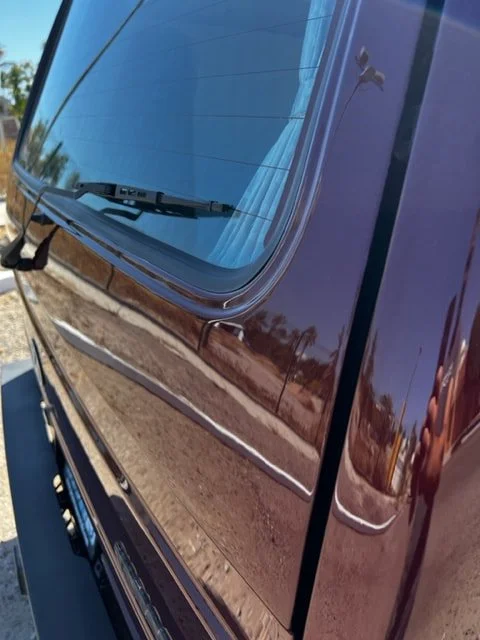
Keep a few photographs of the exposed opening, completed corrosion repair and final fit, along with the seal’s brand and part number. Those records are more useful later than simply knowing that “the window rubber was changed.”
07 / Budget for the opening you uncover
What changes the cost and time?
The rubber is only one part of the job. Removal and installation, replacement glass, old-sealant cleanup, trim, metalwork, refinishing and drying time can all change the scope. A sound opening and reusable glass are a different project from a windshield surround that needs fabricated metal and paint blending.
Ask for a clear initial scope.
Confirm which windows are included, which seals and trim will be supplied, whether glass is being reused, how breakage is handled and whether a final water test is included.
Agree on the rust discovery step.
Arrange an inspection and revised scope if removal exposes corrosion. Budget and scheduling should allow for proper repair and coating cure before the glass returns.
For DIY planning, confidence with ordinary hand tools is not the same as experience handling gasket-mounted glass. A specialist may be the better choice for the windshield, brittle original glass, awkward framed windows or any opening showing visible rust. Use this guide to understand and discuss the work, and the correct workshop information for the detailed procedure.
08 / Common questions
Vanagon window seal FAQs
Can I replace the seal without replacing the glass?
Often, if the glass is sound and comes out intact. Have it assessed for damage first and allow for breakage during removal. A new seal does not make damaged glass suitable for reuse.
Will new rubber stop every windshield leak?
No. It helps when the gasket is the cause and the opening is sound. Corrosion, poor seating, incompatible parts and water entering elsewhere all need separate attention.
Does removing the chrome-looking insert cause leaks?
On the original Vanagon fixed-window seals, the bright insert is decorative. Removing it does not change the seal’s function, according to GoWesty. Check the rubber and the surrounding metal if a leak develops.
Can I cover window-frame rust with a new seal?
That hides the condition without correcting it. Assess and repair corrosion while the glass is out. Perforated or weakened metal needs appropriate body repair before installation.
Is a sliding-window leak fixed by replacing the outer gasket?
Only if that gasket is the leaking part. The frame, its joints, moving-glass seals and drainage may be responsible. Identify the assembly and the actual water path first.
Should I replace all the seals at once?
It can make sense during a planned repaint or when several seals are badly deteriorated. For an isolated leak, diagnose that opening first. Replacing every seal is not a substitute for finding the source.
LiveTheVanLife Restorations · La Paz, Baja California Sur
Start with photos of the problem.
Send the van’s year, the affected window, when it leaks, and clear pictures of the rubber, surrounding paint and damp areas inside. We can discuss the next step and how window work fits into your restoration plans.
Sources & further reading
Researched October 22, 2026. This article is an owner’s planning guide, not a substitute for the workshop manual or the instructions supplied with a specific window, gasket or coating system.
- GoWesty: Vanagon windshield seal, installation difficulty and preparation
- GoWesty: Window Moldings on Vanagons
- GoWesty: front roll-up window seal-kit contents
- Heritage Parts Centre: classic-car window rubber fitting tips
- 3M: 08509 Automotive Bedding and Glazing Compound technical data
Photography: existing LiveTheVanLife project gallery. Photographs show separate views and projects, not a documented step-by-step installation. Diagrams are original explanatory illustrations, simplified and not to scale.
More from the workshop: Vanagon buyer’s guide · Paint & bodywork · Our work & customer stories
