|
Orange County California, St. George Utah, Aspen Colorado, Evergreen Colorado, Yellowstone National Park, Grand Tetons, Portland, Seattle, Vancouver B.C. and back again. The first of several long road trips I had planned for the summer got off to a hot start. The first days’ drive from home to St. George Utah turned into a 7 hour drive though hellish temperatures. As soon as I hit Victorville, California the temperature skyrocketed to over 100 degrees, hitting 109 in Baker and 112 in Vegas. Without A/C, I had no choice but to drive as fast as I could in hopes that the increased airflow at 80mph would offer me some relief from the inferno outside. 80+ MPH and 7 hours through 100+ heat. My Subaru 2.5 motor, now with 3,500 miles on it and with my coolant related issues behind me, ran flawlessly. Coming from the 2.0L Air Cooled motor, I was curious how the new motor would handle extreme heat as watching the Oil Temp Gauge climb steadily was something I was used to with the old motor. I was pleased that the coolant temperature stayed consistent the entire drive! Success! I stopped for the night in a motel (too hot to sleep in the van) and woke up early the next morning for the rest of the drive to Evergreen, CO. Everything was going smooth, and about 6 hours into the drive, I pulled off in Grand Junction, Colorado for some gas. I noticed that there was a slightly odd sound and feel coming from the shifter/transmission when I pulled off. After filling up, I pulled back onto the highway and a mile or so later felt a slip in the transmission. Worried that maybe it was a engine problem, I checked the gauges, all systems normal. Every few seconds the transmission would slip again. Fortunately I was coming up to a exit on the highway and was able to pull off. As I searched for a VW shop in Grand Junction on my phone, I thought to myself how fortunate I was that the Van waited until I was in a decently sized town to act up, the previous 6 hours had been spent driving in triple digit heat through hundreds of miles of no man’s land devoid of cell phone service. I quickly located a shop nearby and made the decision to try to limp the van the 2 miles. Slowly, with my emergency blinkers on and without shifting out of 2nd gear, I made my way to The Foreign Aid. I was met there by the owner who grabbed the keys from me and drove the van down the block and back. “Yep, your main shaft is F’d, you’re going to need a new transmission,” he told me. Steve (why are all these guys named Steve!?) was a little rough around the edges. A tough old Harley guy, I could feel him sizing me up, trying to gauge how much he could get away with. My response was to begin spewing as much Vanagon and Transaxle knowledge I could muster, complete with part numbers in a attempt to say to Steve “I know enough to know when I'm being hustled, so don't try it.” A number of phone calls and several hours later, and we had established that there was not a single Air Cooled Vanagon Transmission anywhere within the Western U.S. that was rebuilt and sitting on a shelf for us to order and have delivered to the shop. The only option would be to drop my transmission, and send it off to a rebuilder, then ship the transmission back and replace it. This could take several weeks at best he implied. Phone calls were put in to many of the best known names in the Vanagon parts business. Finally Rocky Mountain Westy referred us to a gentleman in Colorado Springs named Mr. Gas. This Mr. Gas fellow (Real name: Greg Sayers) claimed that he could get my transmission rebuilt in about a week and began to explain to me in detail all of the different things he would be doing to the transmission and a laundry list of upgrades that I should consider. Thrust plates, Limited Slip Differentials, Steel Cage Bearings, Main Shaft Bearings, Gear Ratios, on and on. My head was already spinning, probably from lack of hydration from the desert heat and 1000 mile drive, and I did my best to write down all of the terminology that Greg was sharing with me for later research. I immediately liked Greg, he struck me as knowledgeable, and confident, without being a know-it-all or pushy. He sounded fair and honest, and gave me the impression (over the phone nonetheless) that he could get the job done on time and on budget, not something that happens very often with Vanagons. Shortly thereafter, the decision was made to do the rebuild with Mr. Gas, to drop my transmission out of my Van, throw it in the back of a car rental and drive it to him to begin the rebuild in Colorado Springs the next day. When I arrived at Mr. Gas the following day, Greg was waiting for me. I was in luck he told me, that day was his breakdown day, the one day a week when he disassembles transaxles that come in. I grabbed mine from out of the car and to my surprise Greg threw it up on his workbench and began tearing it down right in front of me. The mysteries of all types of electrical and mechanical things and how they are assembled has always fascinated me, and the opportunity to see my transmission taken apart piece by piece in front of me was like my very own episode of “How It’s Made”. Greg patiently answered all of my questions about what each little part was and its function in the working of the transmission. A rebuild and a free education in transaxles!? I was in my element. Greg informed me that these transmission were not built for the high speeds that the van was now capable of with the Subaru Motor, which combined with the extreme desert heat I drove through, fried my bearings and led to the failure of the main shaft bearing. Once the bearing failed, the main shaft became loose and started moving around inside the transmission and began chewing up my gears. Fortunately since I had recognized the issue quickly enough the damage was limited to my 4th gear. Had I kept driving on the highway, even for a couple of more miles, likely the entire transmission would have grenaded and I would have not been able to do a rebuild. I wanted this transmission to be built for reliability even while being pushed by my new, much more powerful than stock, Subaru motor. On the advice of Greg, we settled on the following upgrades for my transaxle:
In about a week, I picked up the completed transmission from Greg, drove it back the several hundred miles to Grand Junction and had it reinstalled in a morning. Total cost with rebuild and installation was about $3500. Back on the road with my fresh rebuild, I immediately set out to break it in. I took it up and over the Rockies on I-70 and arrived at my parent’s house in Evergreen, Colorado with no issues. It was recommended to break it in by running it at different RPMs and shifting through the gears as much as possible over the first several hundred miles, which I did. To try out the new Limited Slip Differential, I drove the van up a steep hill behind my parent’s house and had Teri film the wheels in slow motion so I could see the Limited Slip in action. Both of the rear tires grabbed and helped the van claw its way up the incline. Over the course of the next month and 3,500 miles, I drove from Colorado up to Yellowstone, over to Oregon, Washington and British Columbia and then back down the coast to Southern California. After approximately a 1,000 mile break-in period, I switched out the transmission oil and replaced it with a very expensive and high quality synthetic oil called BG Syncro Shift 2. It’s a SAE 75W-80 GL-4 oil and ran me about $17 a quart. Pricey stuff, but worth it. The transmission shifts so much smoother with the synthetic oil. Rebuilding your transaxle is something that every Vanagon owner will have to do at some point. If you’re doing an engine conversion, it’s definitely something you will have to do, sooner rather than later. I chose to wait until my transmission failed after doing my conversion (this was a risky choice). If you have the money, do it at the same time as your engine conversion or you risk breaking things inside the transmission that will increase the cost of the rebuild when it fails. The Peloquin LSD while not necessary, should provide you with a good deal more off-road traction and allow you to get into some spots that you may not have been able to previously. It can also give you just enough confidence for you to get yourself into trouble, such as I did while on this forest service road in Olympic National Park. Regarding transmission rebuilders, there are several names that come to mind, Rancho Transaxles in Southern California being one of the big ones. AA Transaxle is another. Smaller independent rebuilders such as Mr. Gas can also be a great option, especially with the more personalized service that they may be able to offer you. Pricing depends heavily on options. A bare bones rebuild can run you as little as $800-$900, which may be fine if you are using a stock engine. With an engine conversion, the extra speed and horsepower that it allows will require some extra upgrades that will push up the price quite a bit. The Peloquin alone costs $1200. Just like anything else Vanagon related, the skies (and your purse) are the limit. All in all, my rebuilt transaxle cost me about $2500, not including installation. If theres anything that I didn't cover here, please feel free to ask me in the comments below. 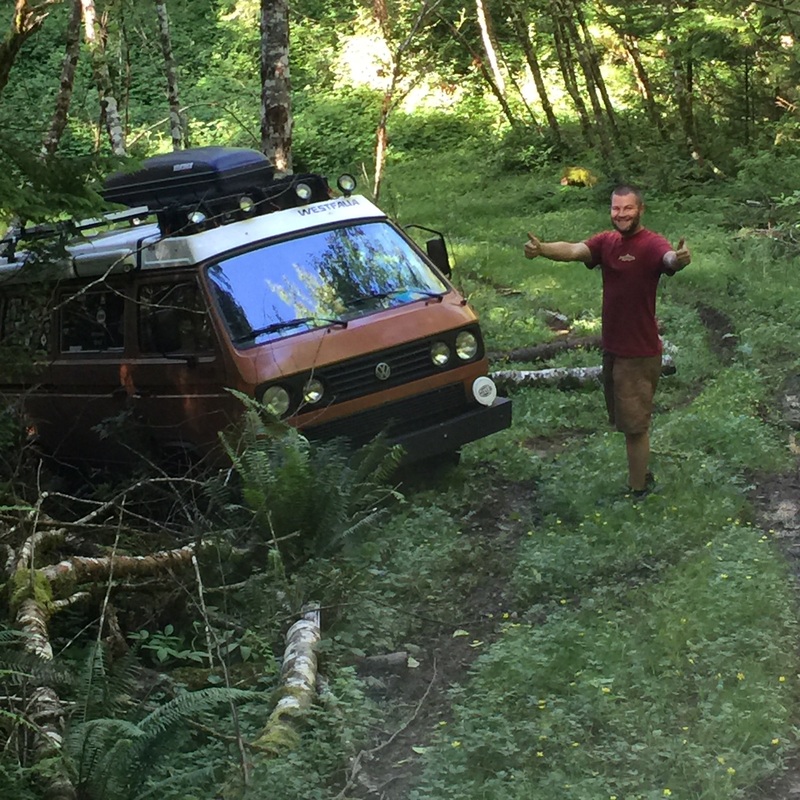
9 Comments
|
CategoriesArchives
March 2018
|
 RSS Feed