|
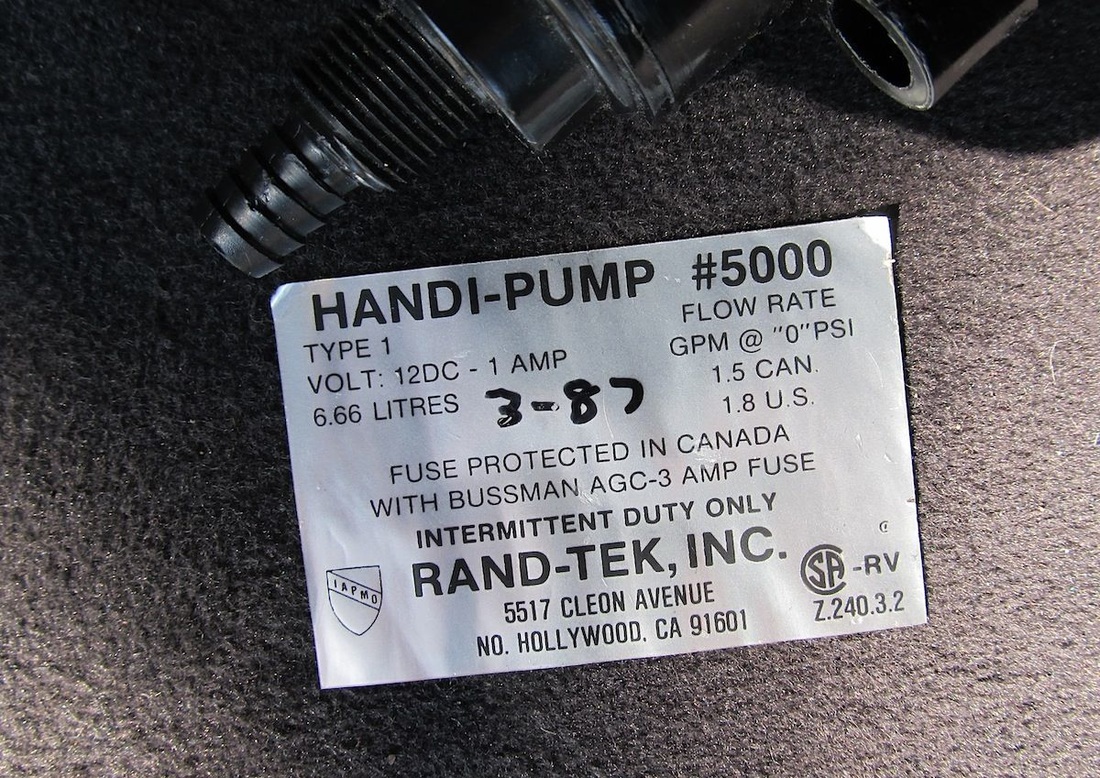
MOD submitted by Robert Peters. Out with the ancient under-van propane tank... replaced with adaption for 1-lb. propane canisters. Works great, feels safer, no more worries about being able to fill the old iron tank, no more issues entering toll tunnels or boarding ferries, and saves some weight on what's already the heavy side of the Westy... (-:  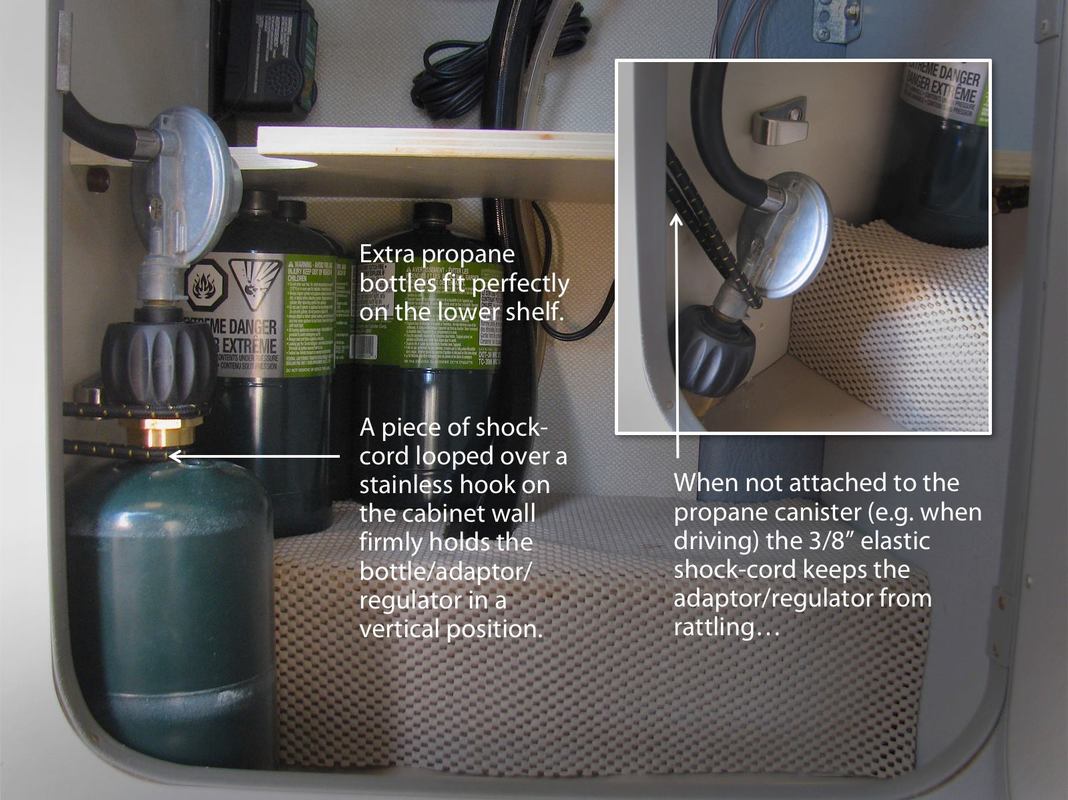 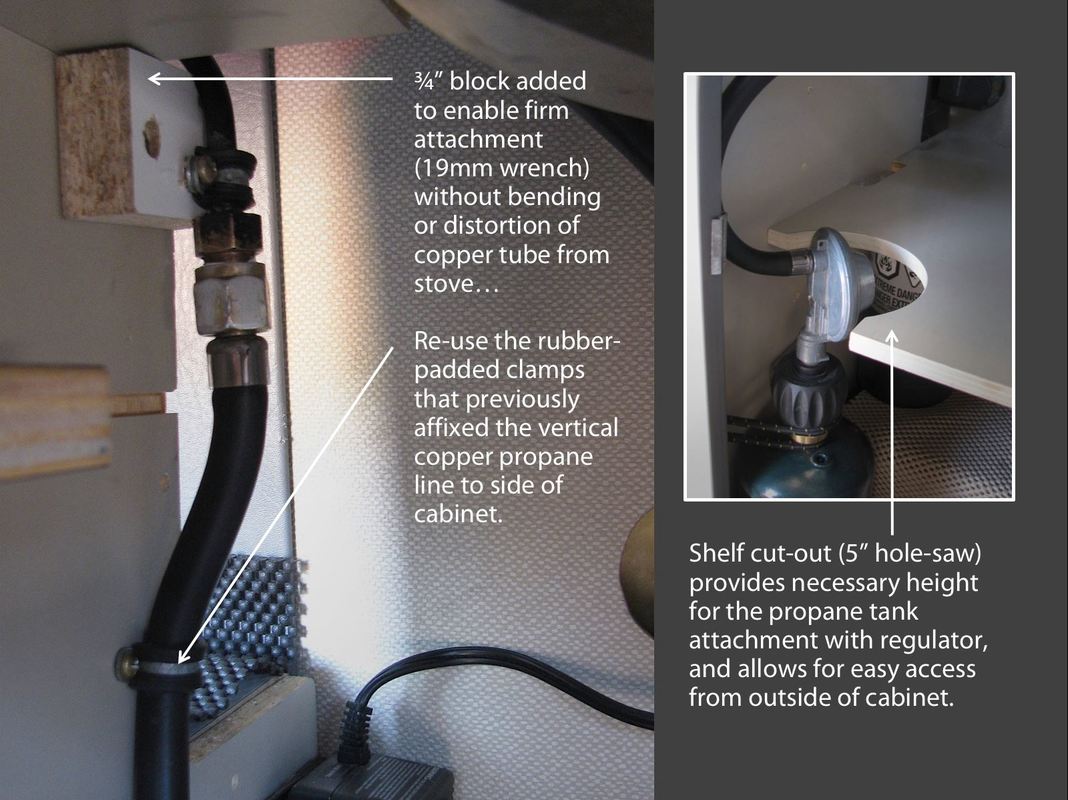
4 Comments
 I’ve done 20,000 miles in the past 5 months driving a giant lap around the USA and Canada. With that much wheel time in the Westy its important that everything be just right. I’ve spent years perfecting my perfect Vanagon cockpit, and below i'm going to list all of the things big, and a small, i’ve done to make it comfortable, reliable, practical, and fun. Ill also give you my reasons for adding them to the Van, and why you might want to consider them too. There’s a lot going on here, so grab your favorite beverage and join me for a tour around the front of the Van. Custom Speedhut Cluster Gauges by North Westy: $950 My Van was built in 1982, its 30 plus year old Speedometer was never accurate (it was off between 5 and 10mph), its analog clock no longer worked, it had no tachometer, and no way for me to monitor the engine's health. This custom cluster was assembled using Speedhut Gauges by North Westy in Renton, Wa. They take a stock vanagon cluster, remove the gauges in the middle, and install the Speedhut gauges in a custom bracket made to fit the stock cluster. What's more, they provide clear directions on how to connect it with minor modifications to your existing wiring. More info here Rexing V1 1080P Dash Camera: $99 You’ve spent all the time and money building your rig, and you need to do all you can to protect it. I’m a big fan of personal video surveillance. Video footage of any incident basically eliminates any he said, she said. If you ever find yourself in a accident thats not your fault, you have video footage to help your case. Its red light in your windshield also helps deter theft by letting would be thieves know your watching. When I replaced my headliner, I installed a dual USB port connector under it and ran two usb cable to just above the windshield and behind my rear view mirror, allowing me to power two accessories (the dash cam being one, my GoPro being the other) without ugly cables dangling all over the rest of my dash. More info and link to purchase here 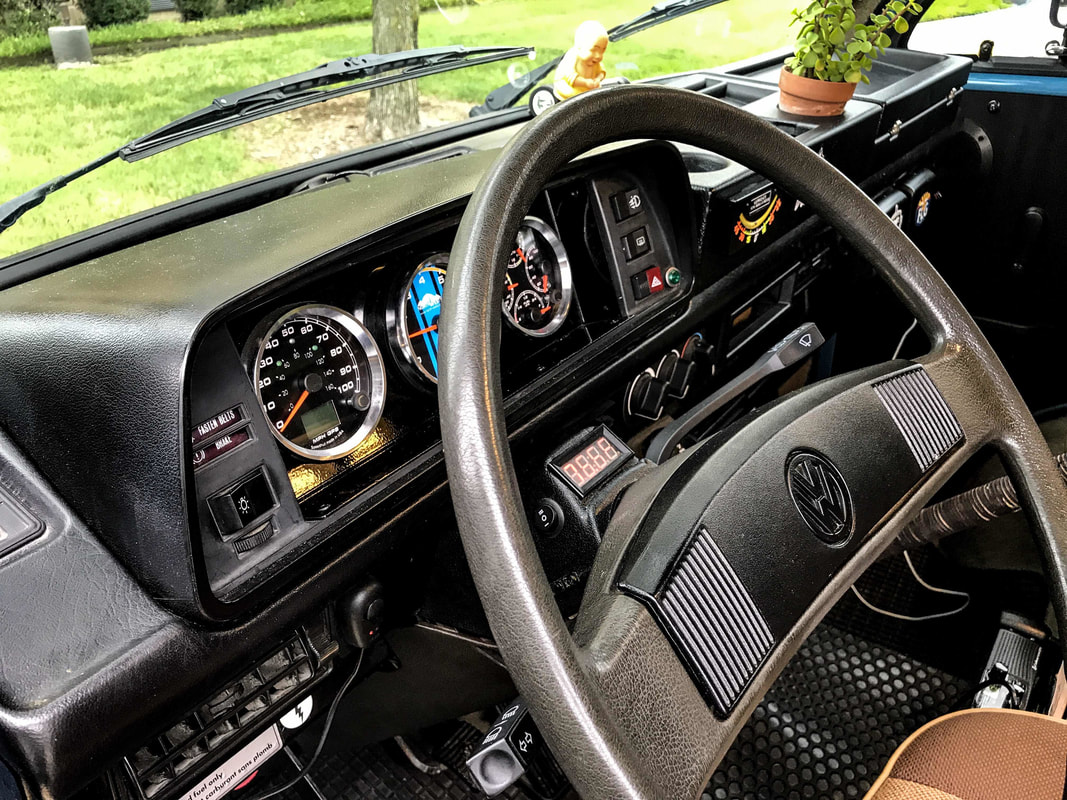 Dash Tidy with Fold out Map Desk: 58lbs I had a big sloping slab of empty space on my dash. I knew there had to be a better way to utilize that space. Adding this Dash Tidy sold by CamperVanCulture in the UK gives you two cup holders, 3 trays, and a really cool (though not very practical) flip out map desk. The map desk looks cool as heck, but is a little too flimsy to be really useable. However when folded it acts as a 4th tray so the flimsiness of the desk isn't too big of a deal. It does require you to cut your dash pad to make it fit if you have the later model Vanagon’s padded dash, and to screw or fasten it some way (I screwed mine in). If you have a early Vanagon, it should fit your dash with less fussing. Grab yours here Steel Center Console Lock Box: $595 I hate underutilized space in the van. This steel console and lock box is designed to fit perfectly in the unused space between the front seats. Forged from a solid block of steel (ok not really) by the skilled hands of Dave Harrison of VanagonLife, this thing will probably outlast the rest of your Van. It has dual cup holders up front, storage pockets that I use to hold notebooks, and my spare change purse. It has a huge locking box built into the center for keeping all of your valuables as safe as possible. Although given enough time, nothing is impenetrable, this thing is sufficiently sturdy that most smash and grab thieves wont have the time and tools to break it open. I love the piece of mind it gives me when I leave the van, knowing that my valuables are protected behind multiple layers of steel and locks. It mounts to the van securely via the seat belt bolts. This has easily been one of my favorite additions to my van. Critics will claim its too expensive. Find a friend who has one, touch it, feel it, open and close it. This is a quality, hand made product, and worth every penny. Grab yours from VanagonLife here  Anker Dual USB Car Charger: $9.99 Ever bought a cheap usb car charger from a gas station? How did that work out for you? Not all car chargers are made the same. Most will only charge at a maximum of 5w, barely enough to charge most phones, especially when those phone are running things like GPS, Spotify, etc. This car charger will charge not one, but two usb devices at 2.4 amps for a total of 24W. This will quickly charge my iPhone 7 Plus, AND my iPad Pro and is tinier than most on the market. I don’t know how they crammed so much power into such a small device, but this thing is a game changer for charging your small electronics on the go. Designed by a former Google employee, Its cheaper than most on the market to boot. Purchase yours here VW Seat Heater Switch with Outside Temperature: This is a mod I got from Abel over at TexasVanagons.com. He does a tremendous write up on it and I recommend you got check out his blog entry on it for more information. Go check out the article on Texas Vanagons here Grid It Sun Visor Organizer: $19.99 A relatively recent addition, I wanted a place on my visor to keep toll tickets, my vehicle registration, a pen, etc within arms reach. The Drivers side Sun Visor was the perfect place as it was a big blank unused space. What I like about this organizer is it has all of these flexible nylon bands that you can securely store your stuff with. You can grab one here Visor Sunglasses Clips: $11.93 Need a place to keep your sunglasses? I installed one of these Sunglass Clips on each Sun Visor and now we both have a handy place to clip our Sunglasses while not in use. Grab a set here Renogy E.Lumen Multi Function Flashlight: $24.99 I’m a fan of Renogy’s solar panels, so when I heard they were coming out with a solar powered LED flashlight I was intrigued. It has a strong rare earth magnetic so it stays securely on my dash with the solar panel positioned just under my windshield so it stays fully charged for whenever I need it. The flashlight itself is plenty bright, and I have used it on numerous occasions in and around the van. This flashlight has a few other features that are worth noting, including a seatbelt cutter, and window hammer, a compass, red hazard flashing LED lights, and it even has a USB port for charging a phone or other USB accessory in a pinch. Its Metal construction makes it feel like a premium product too, not bad for a little flashlight. Grab one for yourself here Ram Cell Phone Windshield Mount: $41.49 Ever bought a windshield mounted cell phone holder and had it constantly lose suction and fall off while driving? It's freaking maddening! Its worse if your bouncing around off-road. I searched long and hard, and have tried a lot of different mounts for my iPhone. The best i’ve found, hands down is the mounting system sold by Ram Mounts. I think you could probably rip the windshield off if you wanted, it's that strong. What I also love about the mounts are they are modular. If you want a longer arm, they carry a longer arm. Buy a new phone and need a different mount, you can buy just that part. Everything is made of super strong ABS plastic, and feels well made. This is not your typical cheap mount and I can’t recommend it enough. In fact, I like it so much i’ve bought one for my parents for Christmas, and have them in my other cars. Definitely one of those, you get what you pay for purchases. Pay the extra money, and get the best cell phone (or small tablet) holder there is. Period. Grab one here  Alpine UTE-62BT Stereo: $142 I had a Kenwood Bluetooth stereo since I bought the Van. It sounded decent, and it worked decently, but what drove me mad was its display, which was all but unreadable during the day. It drove me crazy! When I was in Upstate NY I visited a old car stereo shop I was familiar with from when I was a kid. I spoke the to the owner, a old hippie car stereo dude. The type of guy who would wax poetic about the good old days, when car stereos were made to last with high quality components. I told him my complaints with the Kenwood, and he explained to me how they used to be great, but had since gone cheap like most of the rest of the car stereo manufacturers using off the shelf components to hit a budget price. Alpine on the other hand, he explained, still designed and made most of their components in house, and could still be trusted to deliver a quality product. Most importantly to me, they used a display I could actually freaking see in the daytime. Take that story with a grain of salt, the guy was high on grass when we were talking, but what I can report is the stereo rocks, and I can easily see it in the daytime. The sound quality is better than the Kenwood to boot. Because of my In-Dash AC unit a regular sized single din stereo wont fit in the vans stock position. In order to make the Alpine fit I had to cut and modify my heater ducting below the dash and install it there. Its not ideal, but i’ve adjusted. Those of you who don’t have the In-Dash A/C like I do should have no issues installing it in the stock location. Grab one for your Van here Rockford Fosgate 4” Speakers: $42 Although 4” speakers by themselves won't blow your doors off, when paired with my 12” Subwoofer mounted under my rear bench seat these rock. They also fit in the stock locations on your Vanagon Door Panels. Grab a pair here Wireless Horn Button: $36.48 I got tired of screwing around with my Vans extremely temperamental horn button. So I bypassed the whole stock setup and instead purchased and installed this handy wireless horn button. Works great, and much less finicky than my stock setup. http://amzn.to/2jZm94K Grab one here CB Radio: $48.20 If your in the back country in a Vanagon convoy with your best buds your going to need a way to communicate. Cell phone networks are spotty at best. What you need is a Citizens Band Radio. A long time favorite of truckers with this handy radio you’ll be shouting “Breaker Breaker” to your buddies in no time. I ran a antenna from the CB Radio to one of the VanagonLife engine vent covers which has a CB Radio Mount in the back of the Van. There a huge antenna gives me all of the range I need to keep in touch. You can get one here 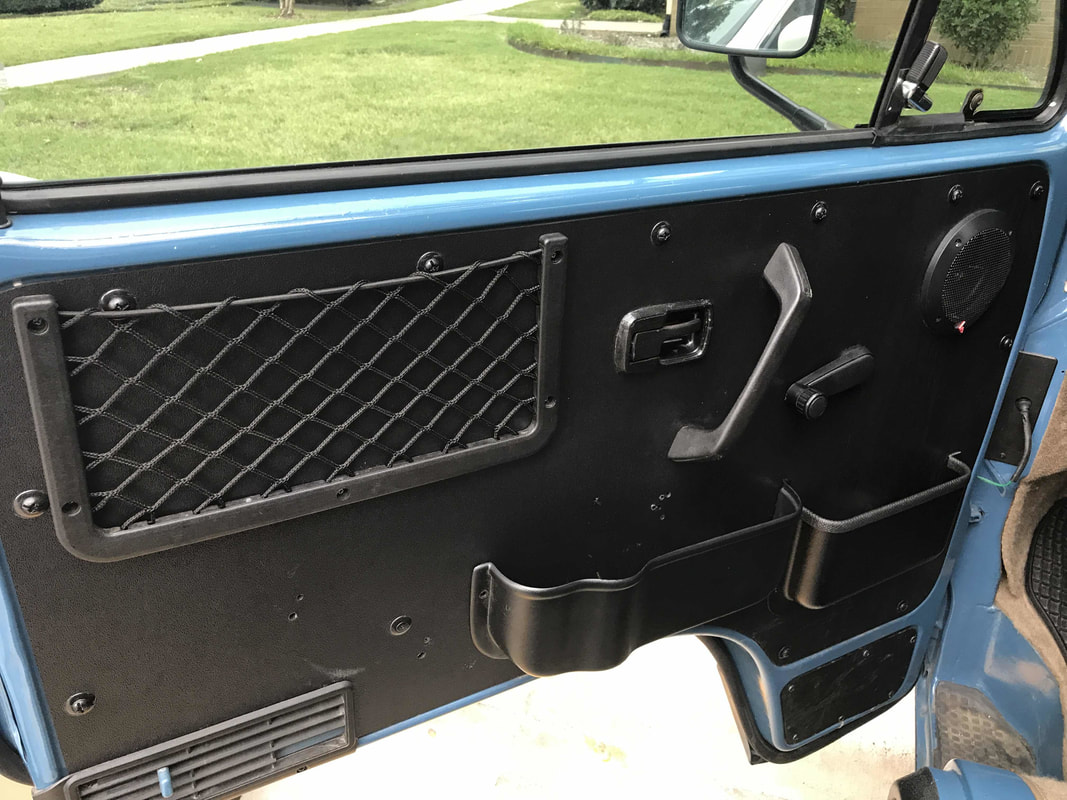 Stow N Go Seats with Brackets: $600 I had finally had enough of my stock Vanagon seats and their poor padding. Driving across the country one of my biggest complaints was with the seats and their lack of comfort. After a long day my back would hurt, my butt cheeks would alternate falling asleep, and my muscles sore and achy. There are several options out there including Recaro Seats costing several thousand dollars a pair. Before I try that route, I wanted to give a set of Stow n Go seats a try. I was able to source custom brackets for them that allow them to mount in the Van from VanLab in Kennewick, Wa and I was also able to grab a pair that Mike had from another project. I have a few hundred miles on them so far and am very pleased. GoWesty SYNC-ROLL-O-METER: $19.95 Even though my Vans not a 4WD Syncro, I do still take it off road quite a bit. With a top heavy van like mine its important to know what angle your leaning so you can try to prevent it from rolling over. Additionally it helps me, with the addition of another in the back to make sure the Van is parked level when camping. Grab one here Flip out Cup Holders: $19.95 Sourced from GoWesty Ive found these cupholders to be very rugged, hold large beverages, and then fold neatly out of the way when not needed. Theyre also inexpensive and match the black on the inside of the Van great! Grab one here 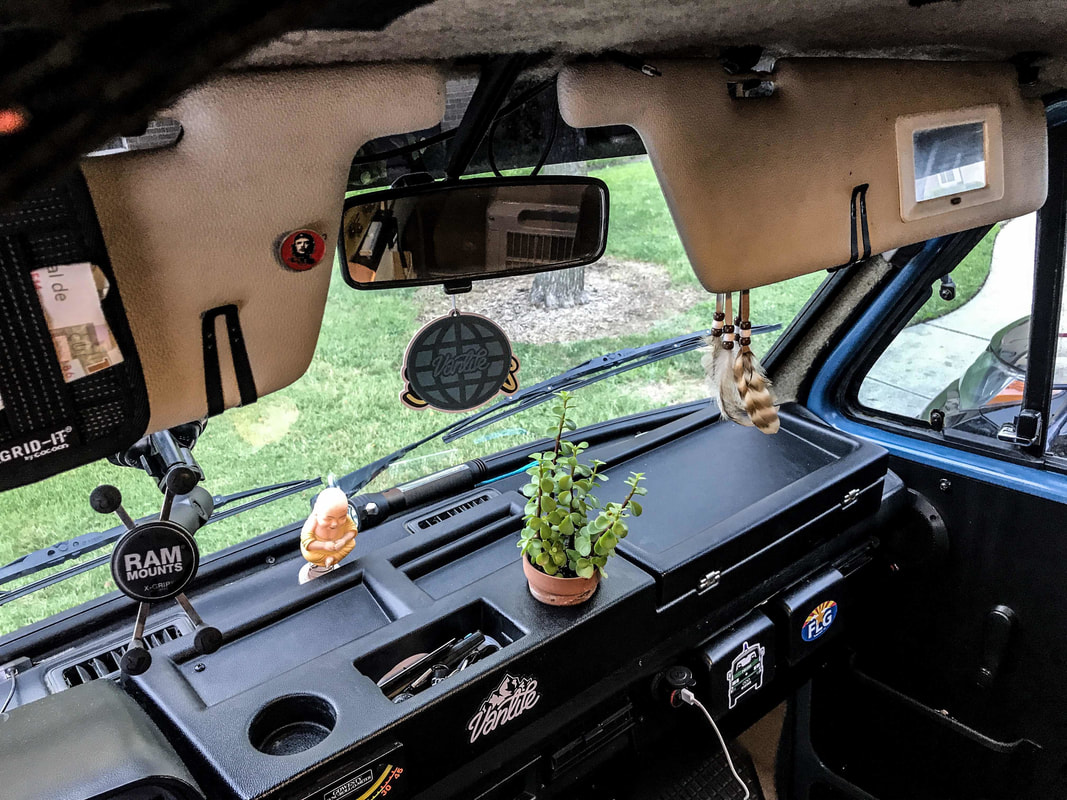 VDO Transmission Temperature Gauge: $31.28 Keep your Van stock if you want the most reliability. Start to modify its suspension, adding extra weight, and a larger motor and you will likely be quickly requiring a rebuilt transmission (like I did!) If you insist on turning your Van into a non stock beast you will need to keep an eye on your stock transmission to make sure its operating at a reasonable temperature. Heat is one of the biggest enemies of your transmission. Ive found with the modifications I've made to mine, along with the best Synthetic Transmission Oil I can buy have helped to keep my Trans Temperatures down even in the worst of conditions. Still, if your Transmission is beginning to see signs of trouble it will likely manifest itself in higher than normal Trans temps and show up on your gauge, allowing you to limp it to a shop before catastrophic failure leaves you stranded somewhere. Order one here Buddha Bobble Head: $7.45 Spread some Peace and Love everywhere you go with this fun Buddha Bobble Head. They also have Jesus, Homer Simpson and more to suit your particular taste. Grab yourself a Buddha here Single Din Pocket: $5.95 When I moved my radio from its stock position due to fitment issues I had to plug the hole it left. I decided to fill it with a Single DIN pocket which gives me a little bit of extra dash storage space. Grab one here 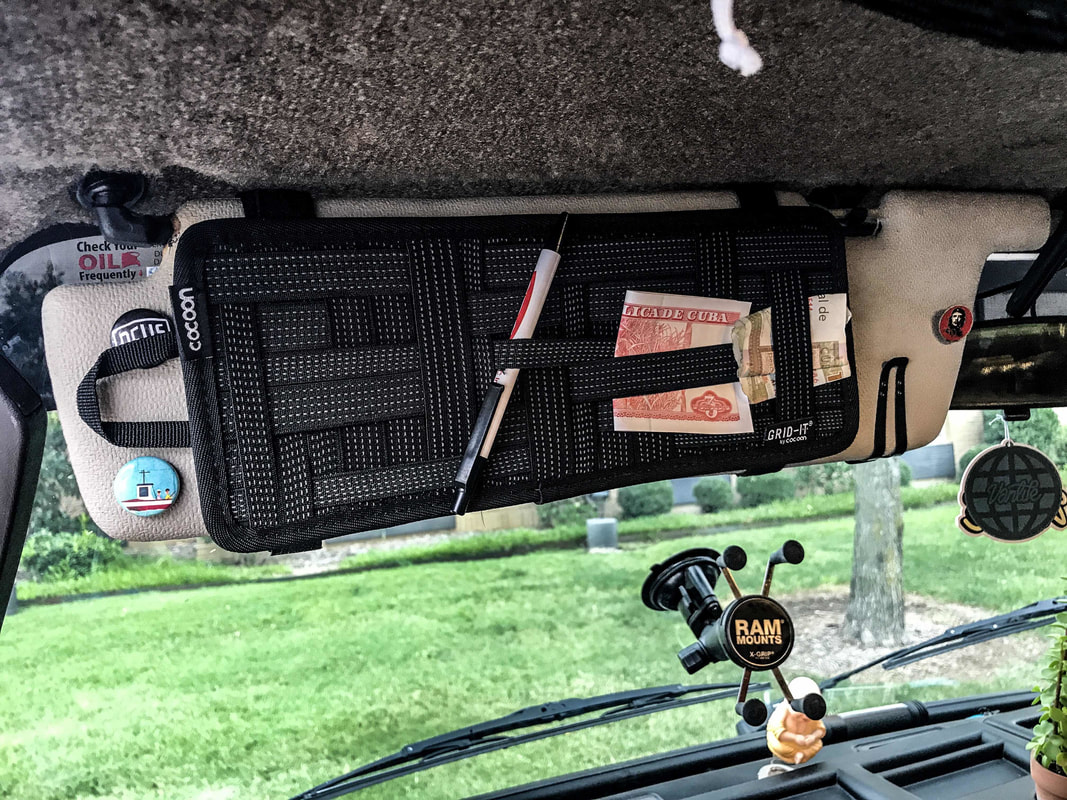 Big Shot Shifter: $309 The stock Vanagon shifter is wimpy. There, I said it. I also find its too short. This thing is big, burley, and feels like it belongs in a big rig. I love it. It sits right where my hand wants it to be, and its throws are precise. I wrapped the metal shaft in leather and added a empi boot off a old VW beetle to cover the base. This thing is definitely a favorite of mine. Order one from RSFab here Velcro Pockets: $12.72 I covered the walls and headliner of my Van in carpeting. I did this for several reasons. It covers most of the stock paint color of the Van (I didnt have the entire inside painted), It adds some extra sound proofing, it adds some extra insulation, and it allows me to use VELCRO! Woo! I have several of these pockets above each seat, which adds handy storage thats within arms reach while i’m driving. Its typically where I stash some gum, chapstick, and a spare set of sunglasses. Grab a set here OSRAM LED Hard Wired Reading Light: $39.95 Mounted above my swiveling passenger seat I use this light in the evening when the seat is in lounge mode (swiveled around) as a reading light. Grab one here RV LED Dome Light: $13.99 This LED Dome Light is super bright and consumes very little power. Grab one here Heavy Duty Vanagon Floor Mats: $69.99 Thick rubber mats help to keep mud and debris off the carpets. Grab a set for your Van here Werksberg ABS Door Panels: Starting at $95 each Stock Vanagon Door Panels are made of a cardboard like material that tends to break down and get wavy over time. These panels are made from super stiff black ABS plastic. They look great, and are extremely durable. These will likely be the last door panels you will ever need to purchase for your Vanagon. The front bottom pocket is optional with the doors. Order some from Werksberg here 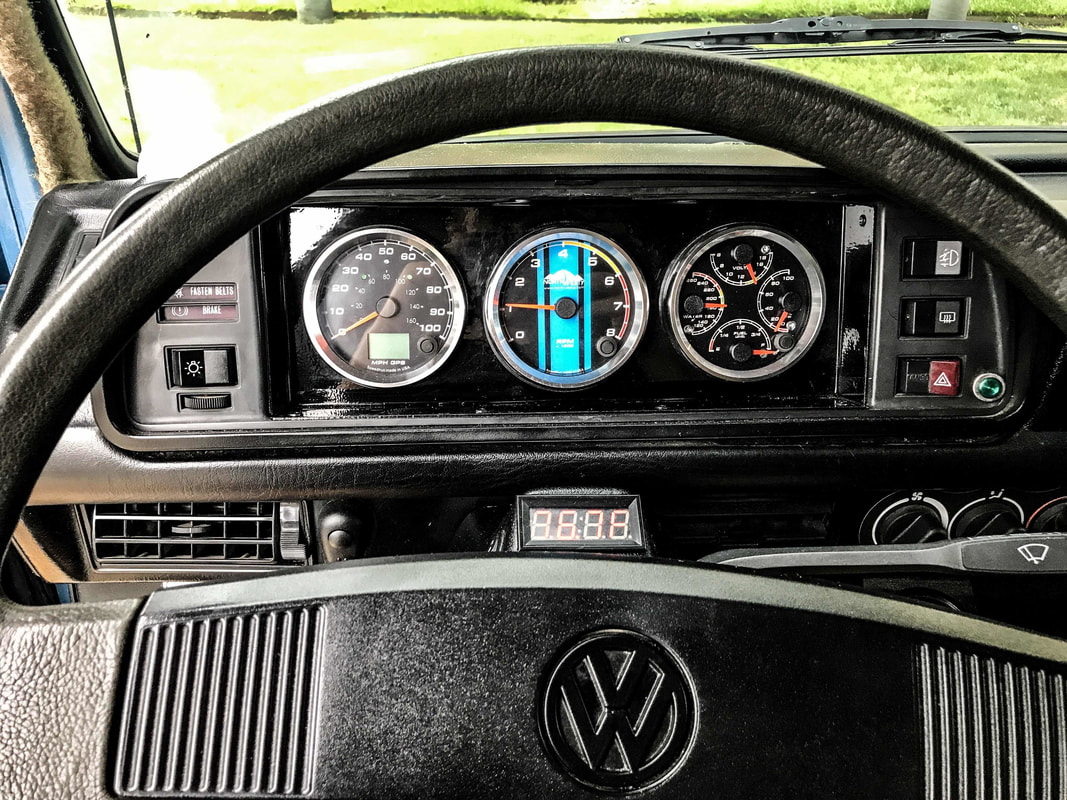 Door Pocket with drink holder: £20.83 These are a great addition to the door panels and gives you another pocket with which to store stuff along with a spot to stick a water bottle. Grab a set from CamperVanCulture here Door Net Pocket: $12.72 Another great pocket for your door, it sits flush with a nylon net. Grab one here VW Jetta MK2 Window Cranks: Stock Vanagon Window Cranks tend to break as your window regulators age and become more stiff. Even taking apart and regreasing my regulators didnt help and I continuously went through replacement aftermarket cranks which would regularly snap in half mid road trip. A friend turned me on to these, which are made of thick plastic, with a bronze bushing on the end where they meet the regulator. Ive yet to snap one in about a year and can attest they stand up to abuse. There is a guy who recently started carrying custom metal door cranks which I plan on trying soon, but for now these are the only window cranks I can recommend. Grab yourself a pair here 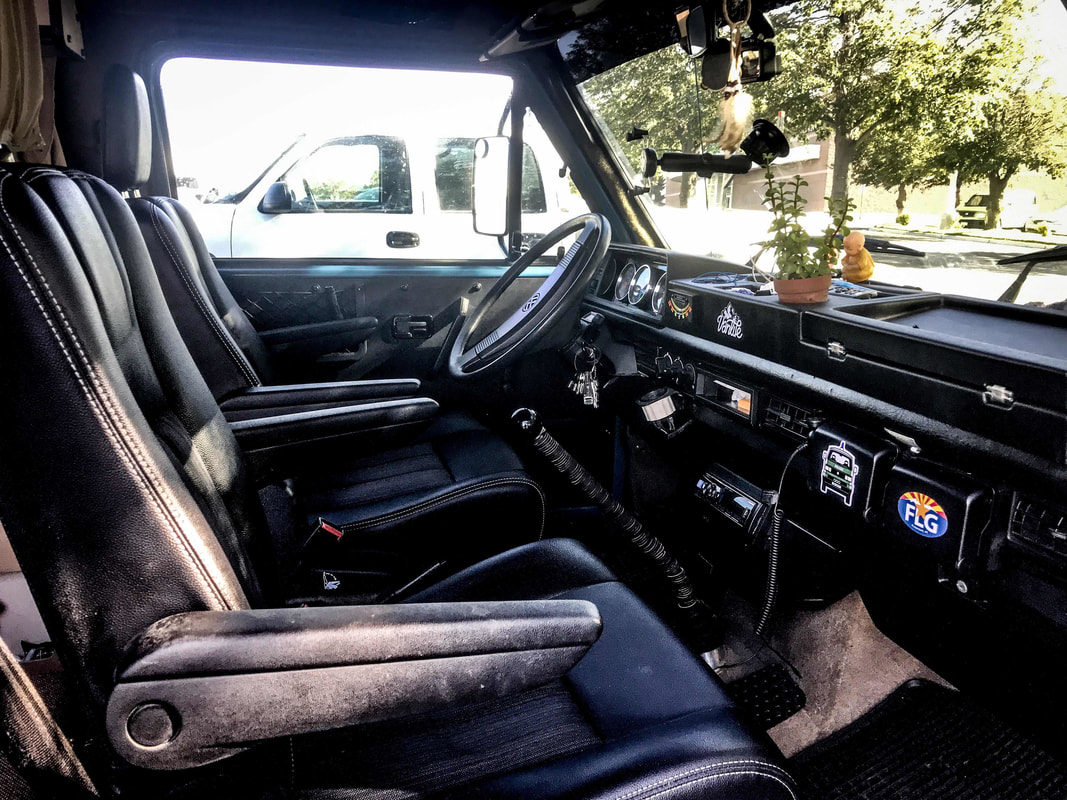 One thing that's always given me a hard time with my van has been the stinking horn. I've replaced the Horn itself, I've rewired it, I've replaced the Horn ring, and I've even replaced the turn signal that the horn ring contacts. Things been the bane of my van existence. I finally threw in the towel and bought a wireless switch to bypass the whole stinking setup entirely. It has a button that I've mounted next to my dash cluster. Easy to install and it works great. Yeah it's not stock, and yeah It would be ideal to have it inside my steering wheel, but I just feel this setup is going to be so much less of a hassle. For those wondering that's a high powered Flosser Air Horn I'm using. Link to wireless switch here: http://amzn.to/2wPaSsY Link to Flosser Air horn here: http://amzn.to/2gSkcWH
Watch a friend give us a demonstration of the Omnia Camping Oven. Buy it HERE
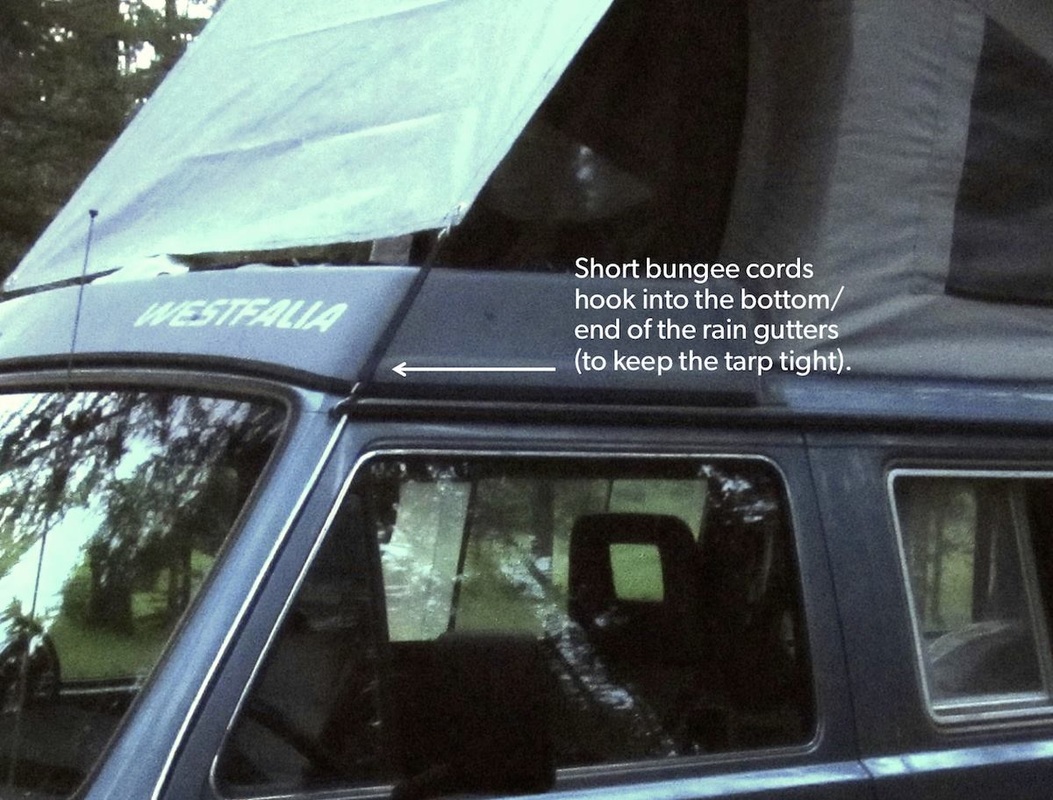
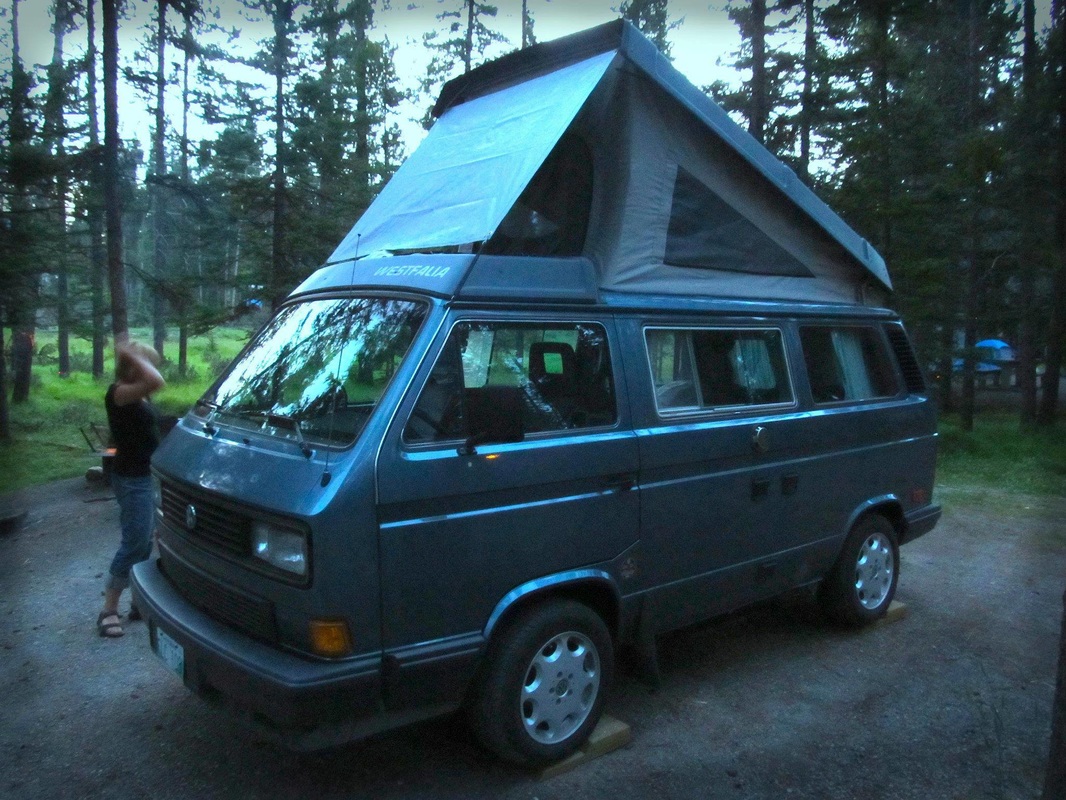
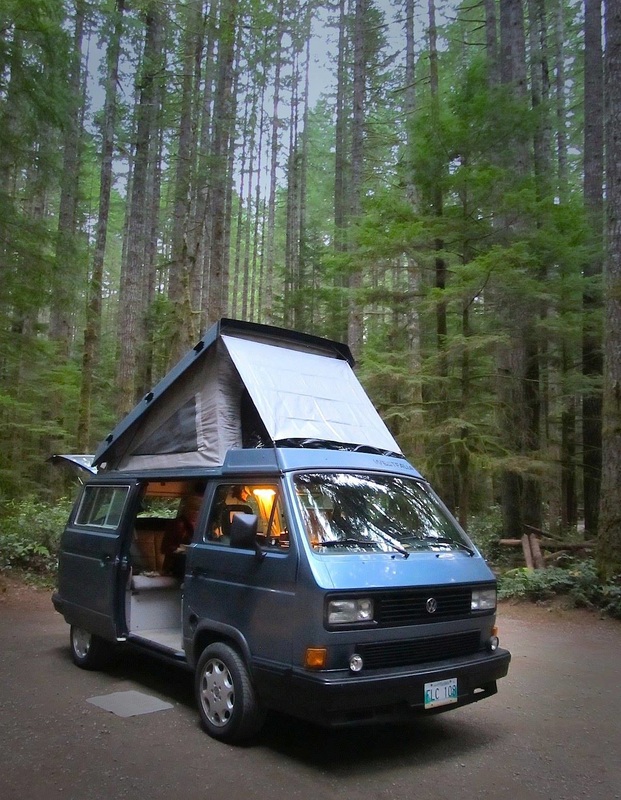
A handy addition for touring is a small tarp to cover the front luggage rack (aka rooftop tub). It's useful to block out hot sun, and also protects quite nicely in driving rain — unlike the "Wasser-Stopper" rainfly that encloses the entire front "vestibule," this simple design allows for cross ventilation. It also provides a degree of "visual privacy" when your front tent window is zipped open.
I've made a few of these (very inexpensively) out of commercial awning material (reflective silver on one side, black on the other, reversible). Just fold over an inch of extra material and sew a "hem" all the way around, then add a grommet to each corner. Two modified "s-hooks" clip into the diagonal braces at the top, and short bungee cords hook into the end of the rain gutters to keep the tarp taught (while still allowing front doors to open). Mod By Robert Peters
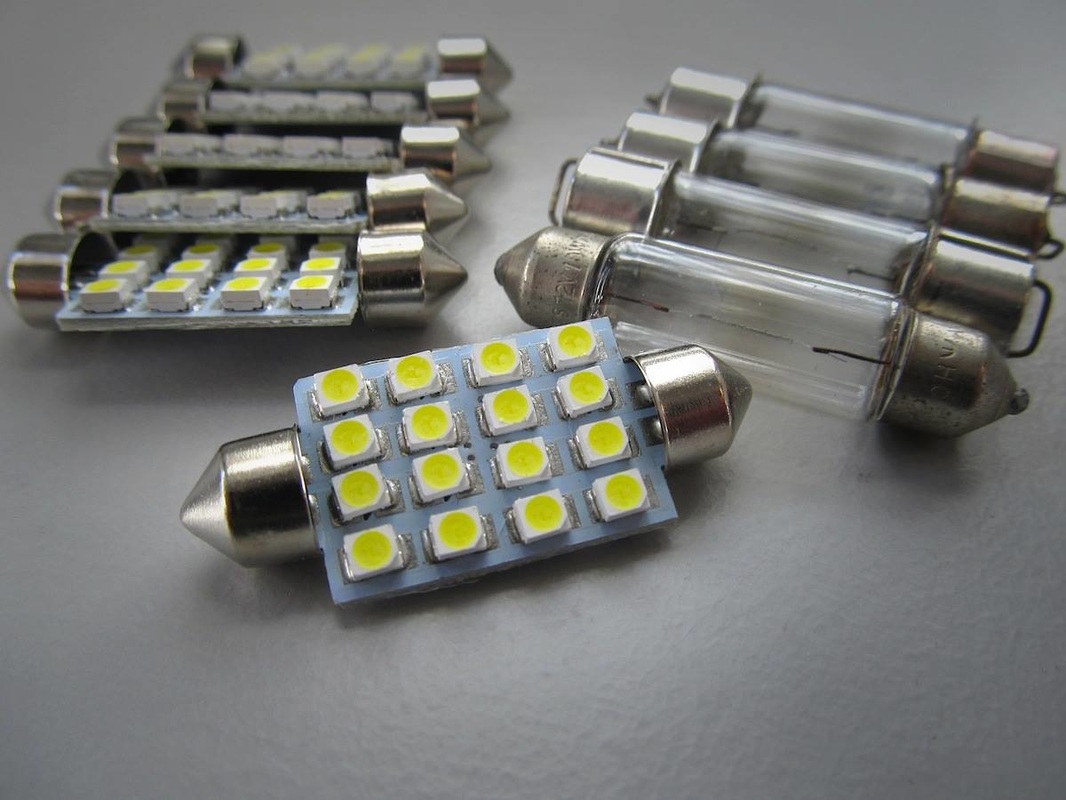
These awesome, super-bright little LEDs arrived in the mail today (thanks Amazon!) and of course I had to install them to replace the "festoon" bulb for the driver's dome light and the 3-bulb "incandescent" fixture in the centre of the cabin. Wow! These LED bulbs rock the casbah! They have distinct advantages over traditional incandescent bulbs (the 10W GE ones with the filaments in the photo) — much higher in efficiency (using 50% to 90% less energy) and they also last a lot longer than traditional incandescent bulbs, e.g. rated at 50,000 hours vs. the average of 1000 hours for incandescent. They offer superior light quality (with less lumen deterioration), and are safer to operate (because they generate less heat and therefore greatly reduce the risk of burns or fires). They are also more environmentally friendly with recyclable components, and are durably built without fragile filaments or glass. (-: Let the light shine on, sisters and brothers... http://www.amazon.com/42mm-White-Festoon-Interior-Light/dp/B00AQAQI6E/ref=sr_1_1?ie=UTF8&qid=1462073072&sr=8-1&keywords=AutoEC%2010%2042mm%2016%20SMD%20LED%20White%20Car%20Dome%20Festoon%20Interior%20Light%20Bulb http://www.amazon.com/AutoEC-Festoon-Dome-Light-White/dp/B00V9SIENC?ie=UTF8&ref_=cm_sw_r_cp_awd_2eHjxbSRD853P Mod Provided by Robert Peters.
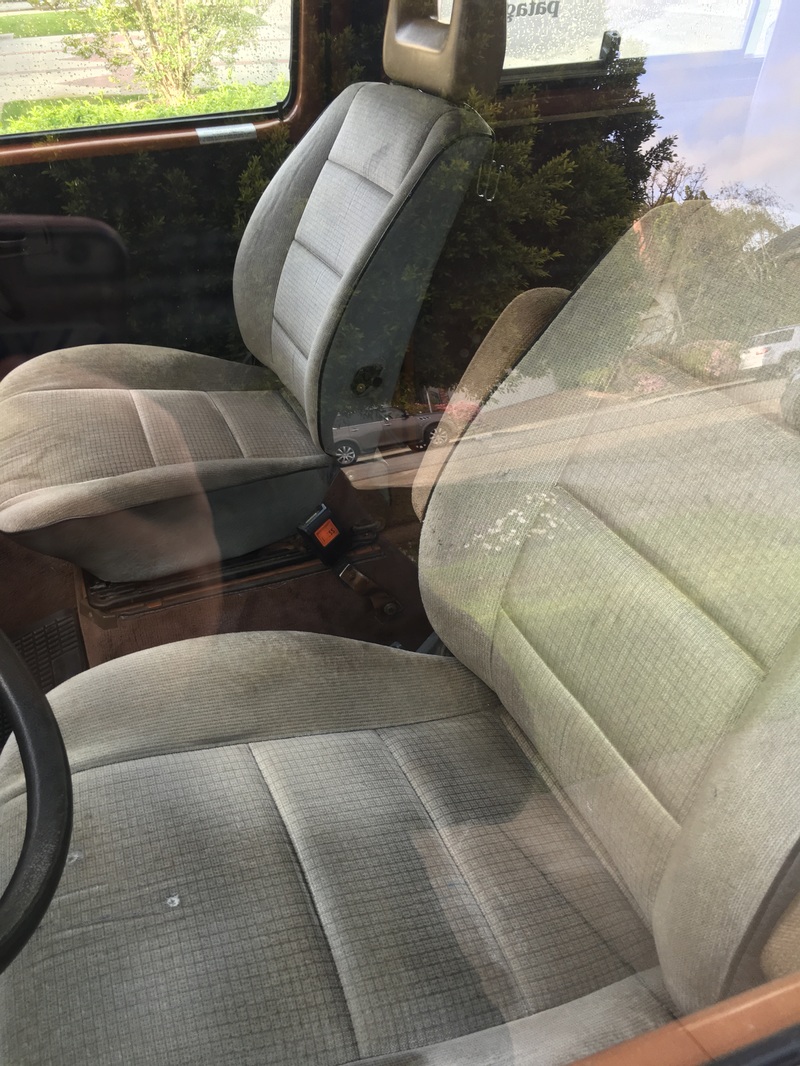
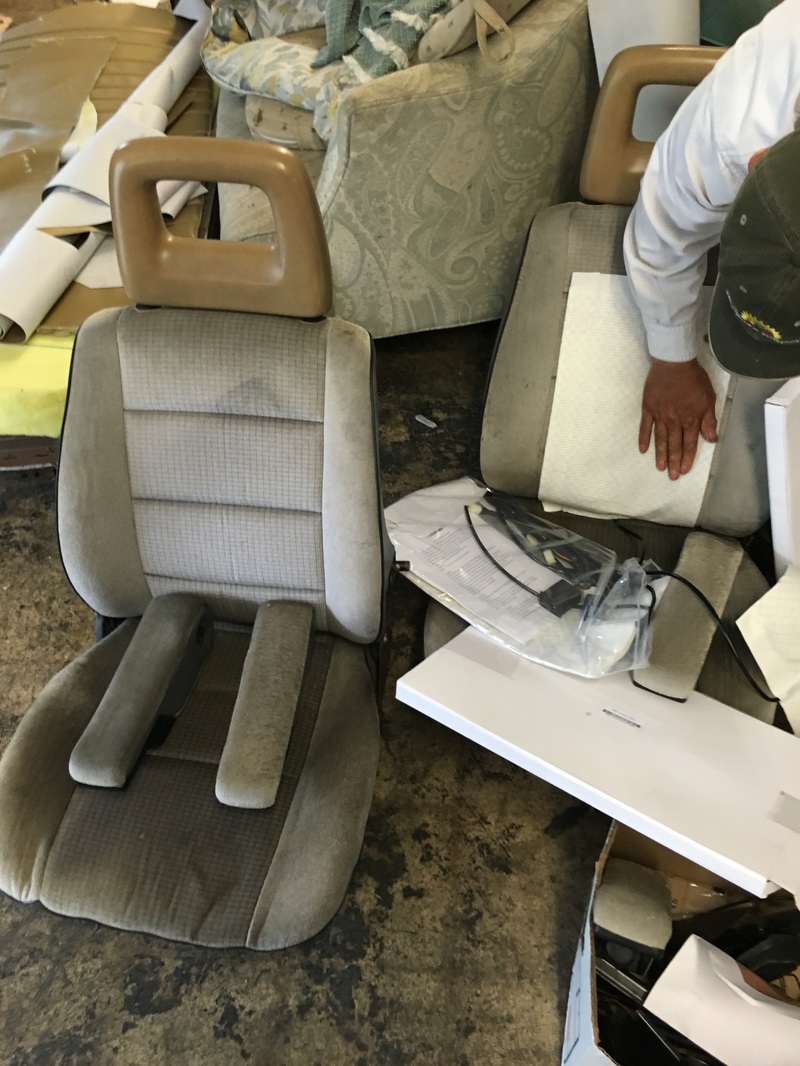
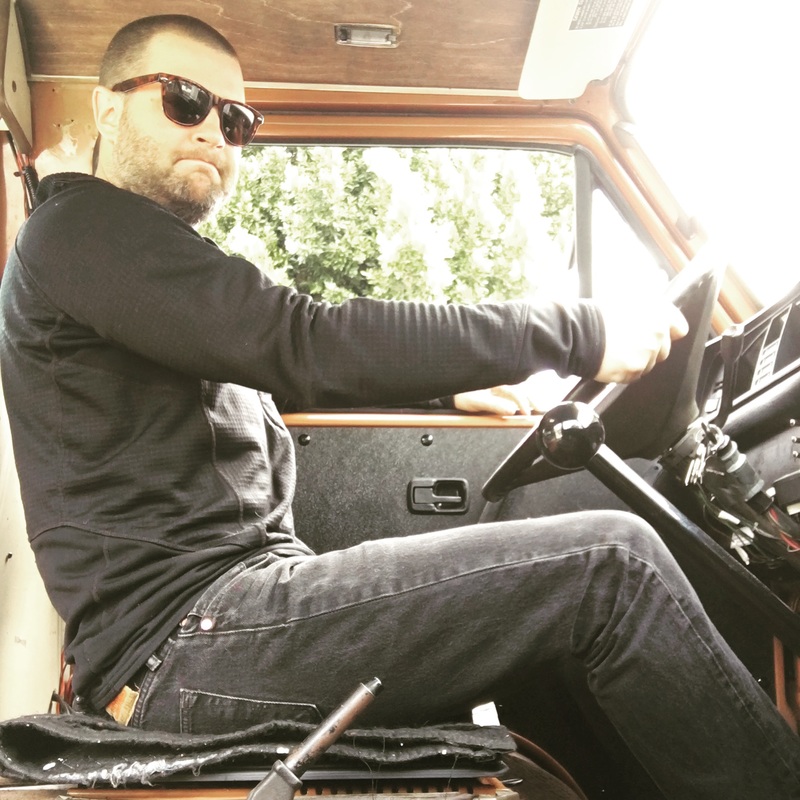
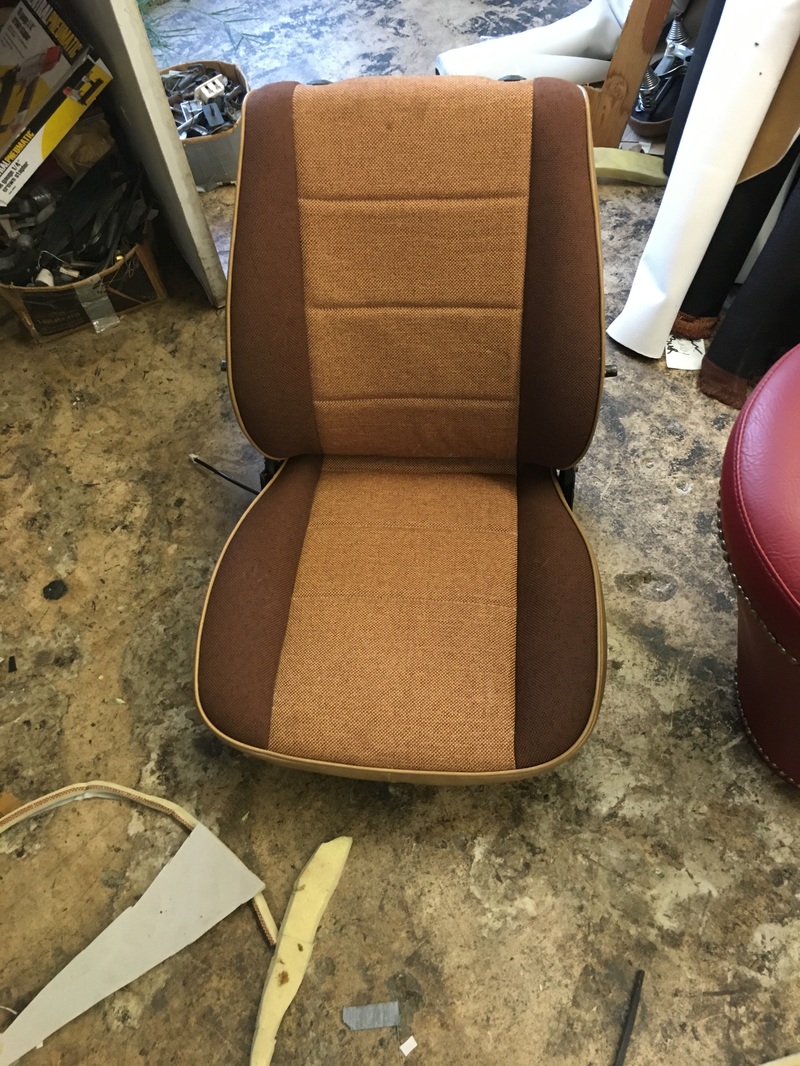
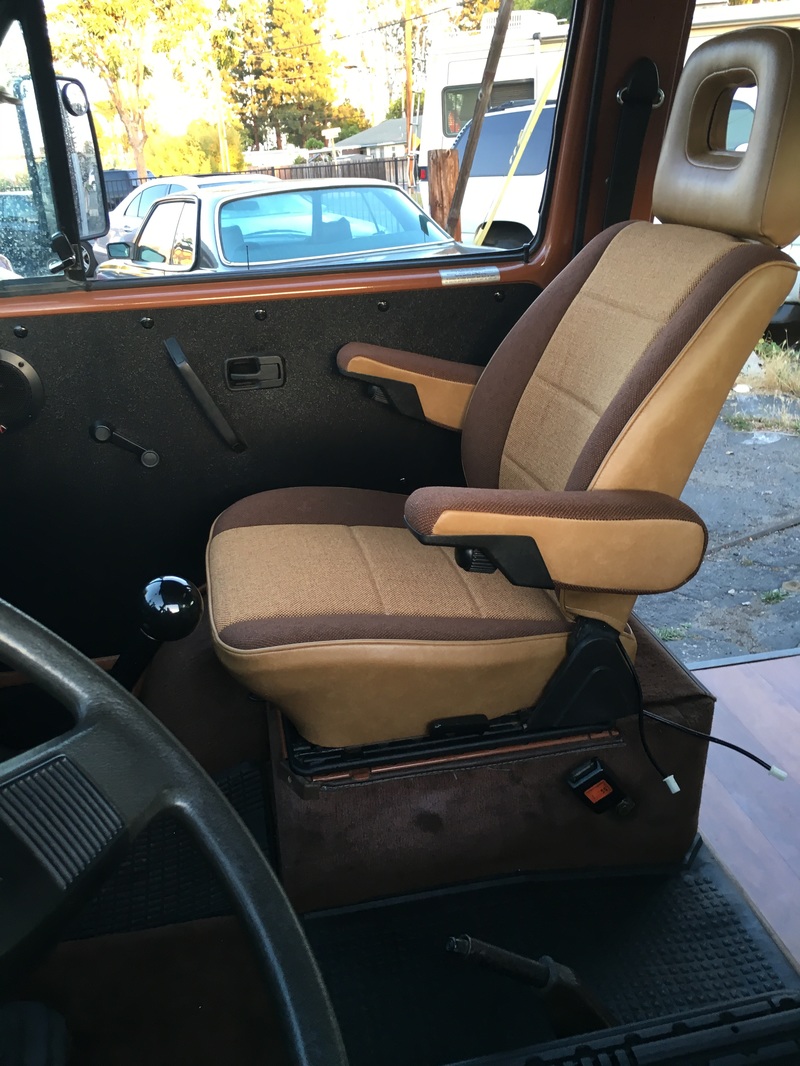
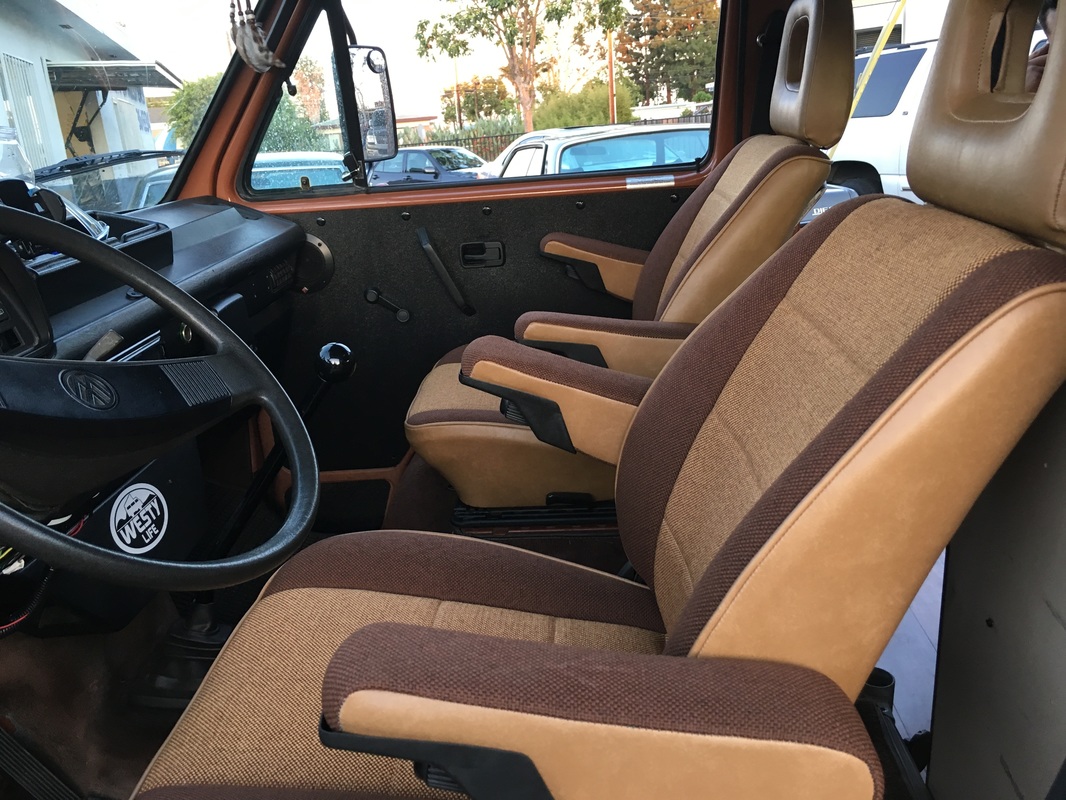 When I bought my Westy, its front seats were pretty old and beat up. They lacked arm rests, which really annoyed me on long journeys, there was a popped spring in the back of my seat, and what little cushioning they started with 30 plus years ago had been pounded away by countless bottoms.
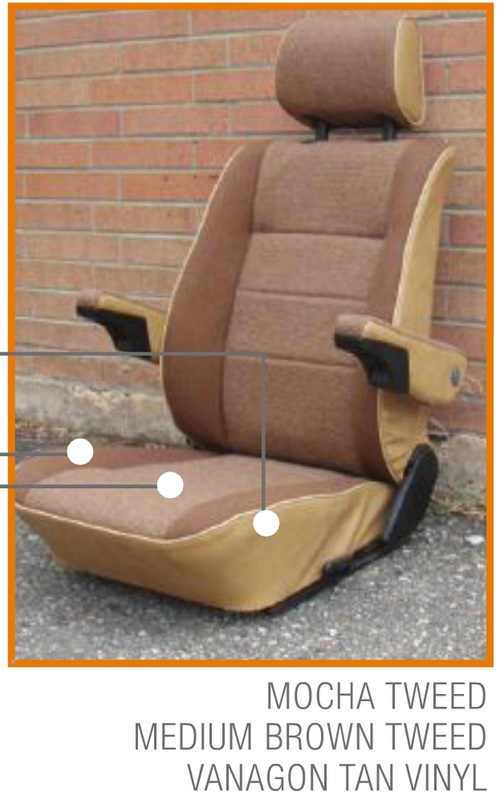
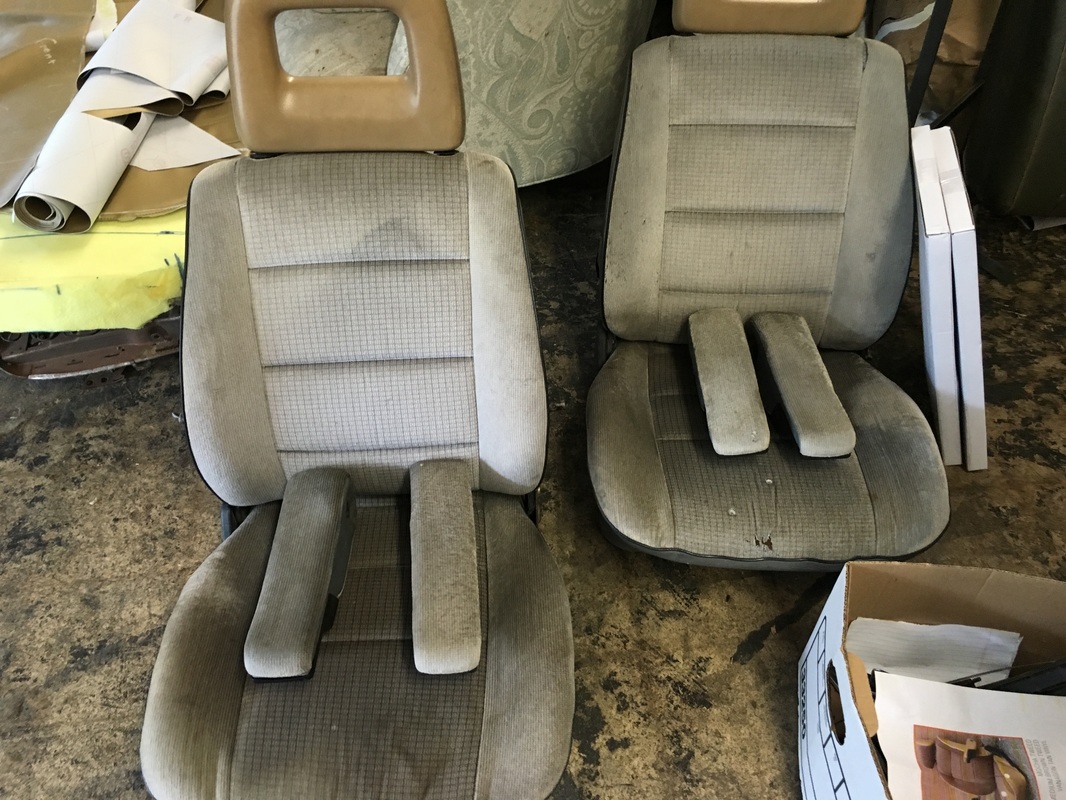
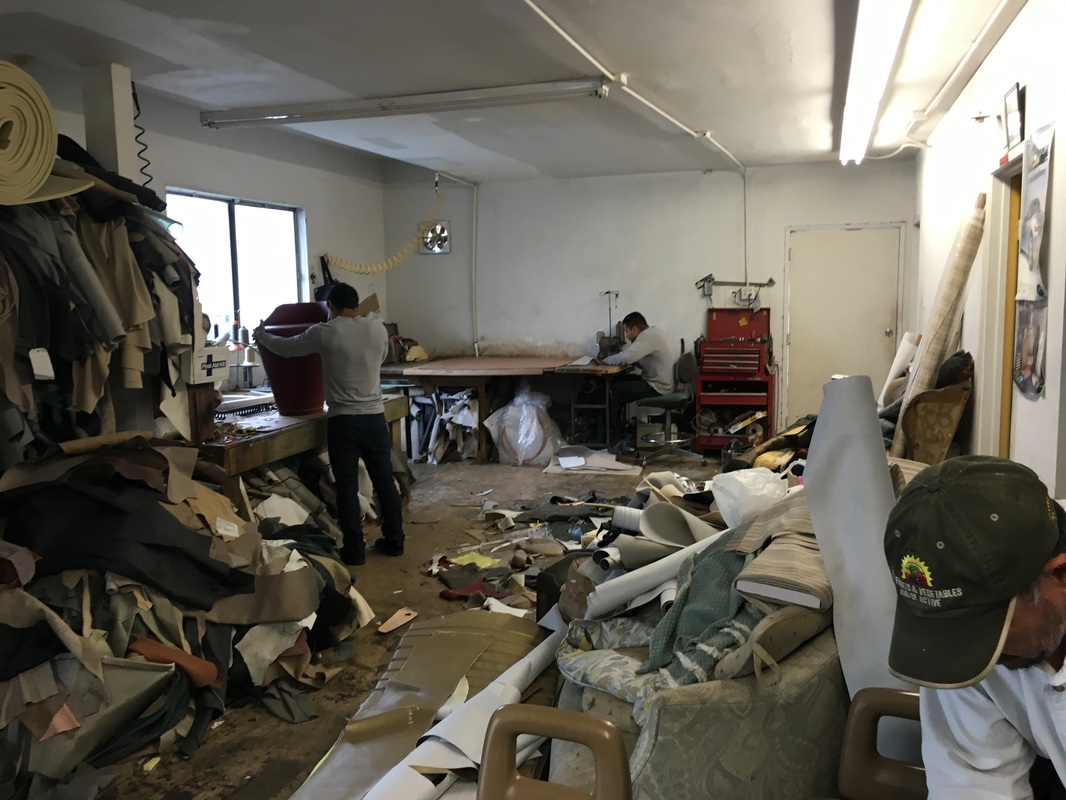
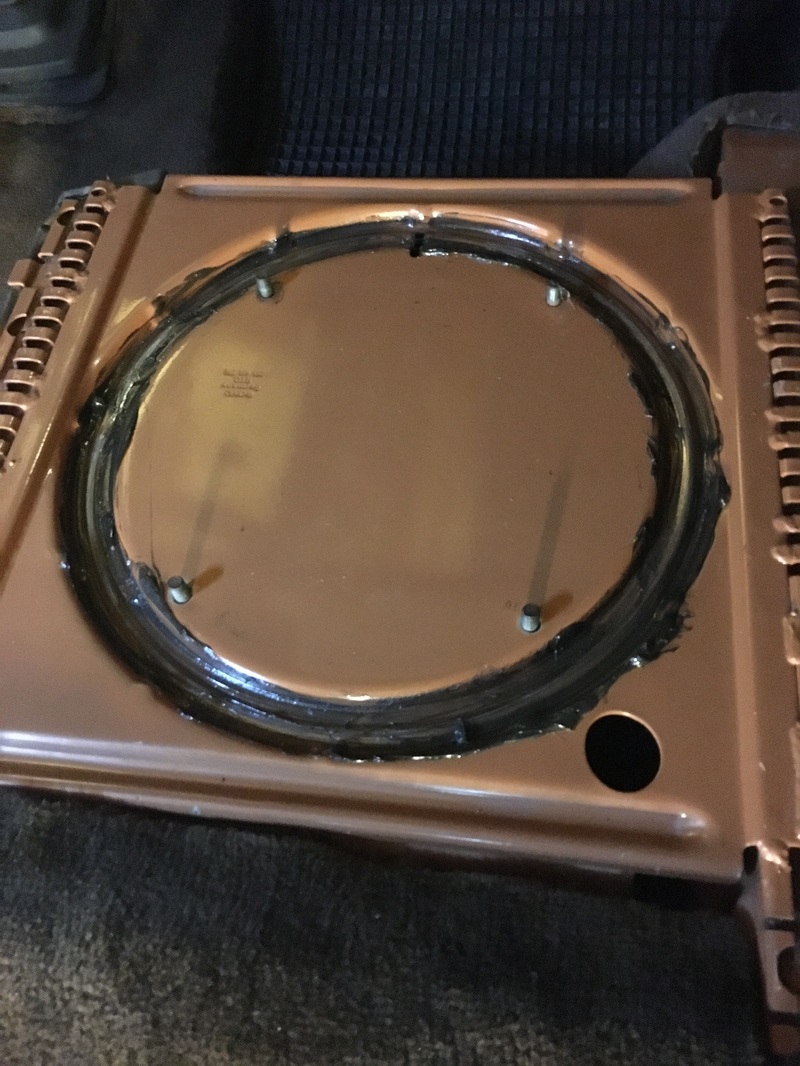
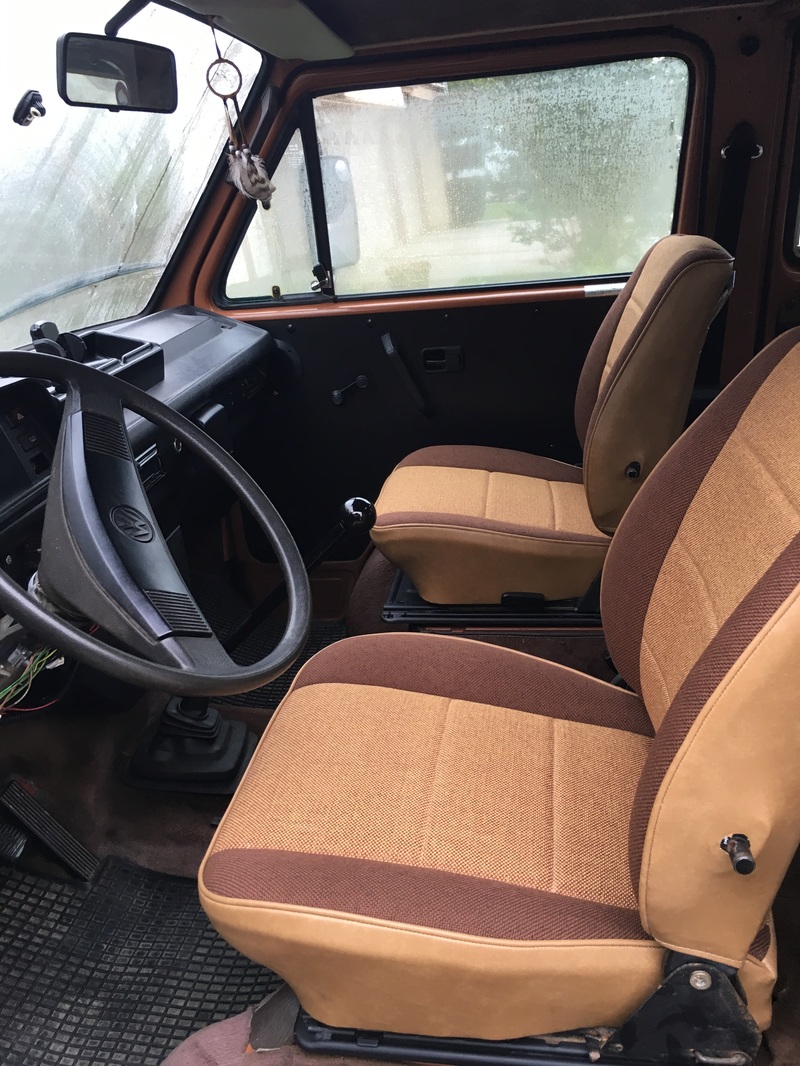
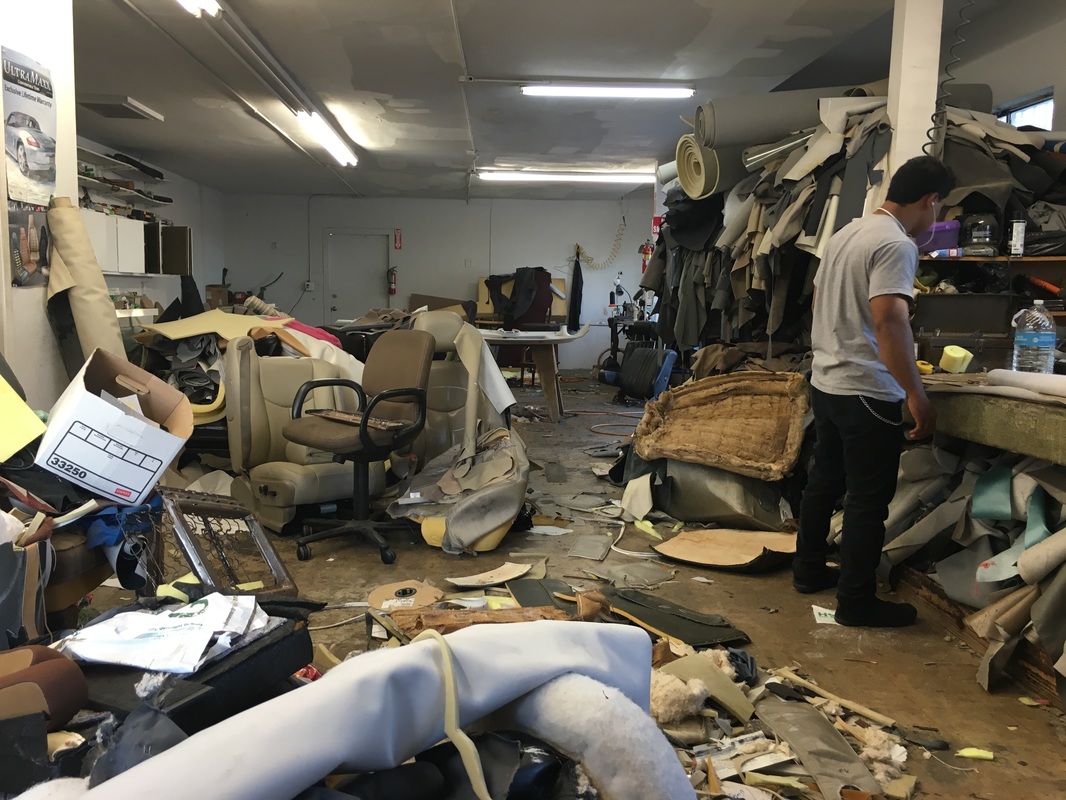
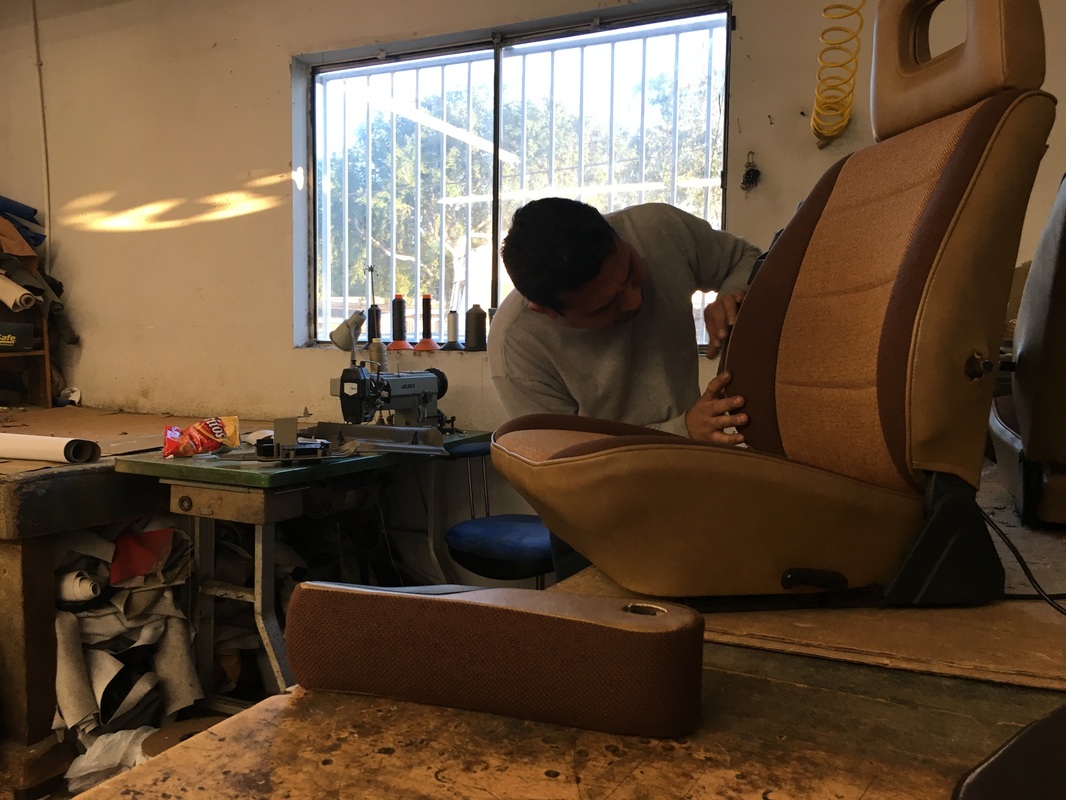
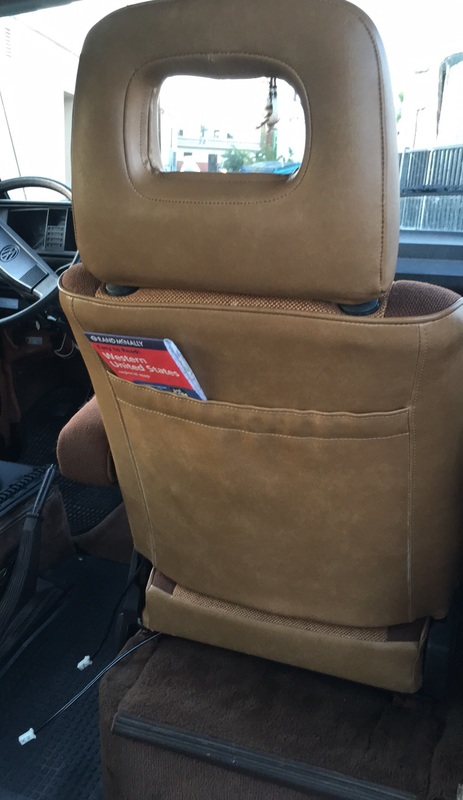
Last summer I located a set of later model Vanagon seats with the fancy adjustable arm rests from a junker on thesamba. These had been sitting in his backyard for a "couple of years" and looked like it. They came complete with cigarette burns, loose stitching and copious amounts of dirt and dust. For $150 for the pair, I knew I would eventually have to get them redone, but I grabbed them regardless as later model seats with the adjustable arm rests are getting tough to find. Fast forward 8 months or so and I finally got around to getting them redone. In my research I found some covers I really liked made by Sew Fine in Denver (see photo above). The browns really matched my vans interior well. I thought the two tone and the tweed really complimented the seats and as a added bonus if I ever spilled my coffee on the seats, it would hide it. Sew Fine sells kits, the one I wanted would have run me around $450 and I would still have to install the kit myself (or have someone else do it). I knew I could do better. Photo of what I wanted in hand I began to drive around and get quotes from different shops. Prices ranged from $600-$1000 for both seats which was a little more than I wanted to spend. Ideally I wanted to try to stay at or close to $500-$600 for the pair. My searching eventually led me to a little hole in the wall shop in Garden Grove, CA named Juan's Upholstery. I immediately liked Juan, he struck me as hard working old school craftsman type, somewhat of a dying breed in my estimation. He took a look at the photo of the seats that I wanted and my current seats and quoted me a price of $490, $540 if I wanted him to sew seat pockets on the back. I agreed and he brought me a fabric sample book. I chose Tan Vinyl for the sides, Sable Tweed for the outside edges of the seat, and Curry Tweed for the inner seat fabric. I gave him a deposit, he ordered the fabric and I made an appointment to bring in the seats the following Friday. While my seats were being done, I took the opportunity to clean up, paint and re grease my swivels, which came out really nice. I couldn't have my new seats sitting on rusty old supports. On Monday I went and picked up my seats. Juan and his guys did a fantastic job, the seats actually look better than in the photo I gave him. I'm no seamstress, but I can tell the stitching is tight, and the fit and finish is top notch. It's amazing how much seats can upgrade the appearance of the inside of your van. If you live in SoCal, make the trip to Juan's shop. He also does headliners, home furniture and more. Guys like this won't be around forever, and you'll get access to his 30 years of experience at really fair prices. You can find Juan on Yelp here... He doesn't have a website, he gives you old school hand written receipts, and he prefers cash. A few people were turned off by that. I think people tend to forget that that's how things were done up until maybe 5-10 years ago. Everyone seemed to get along just fine before then :) Ok rant over. Now go give Juan your money!
These truck mirrors were purchased from Go Westy for $179.99 per side. They can be found here
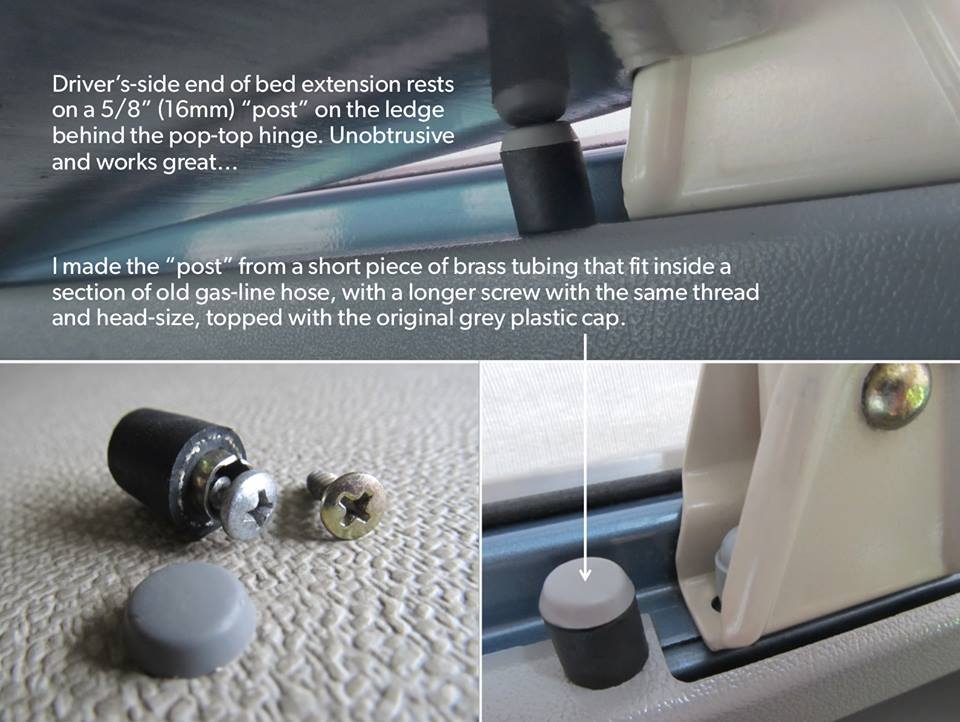
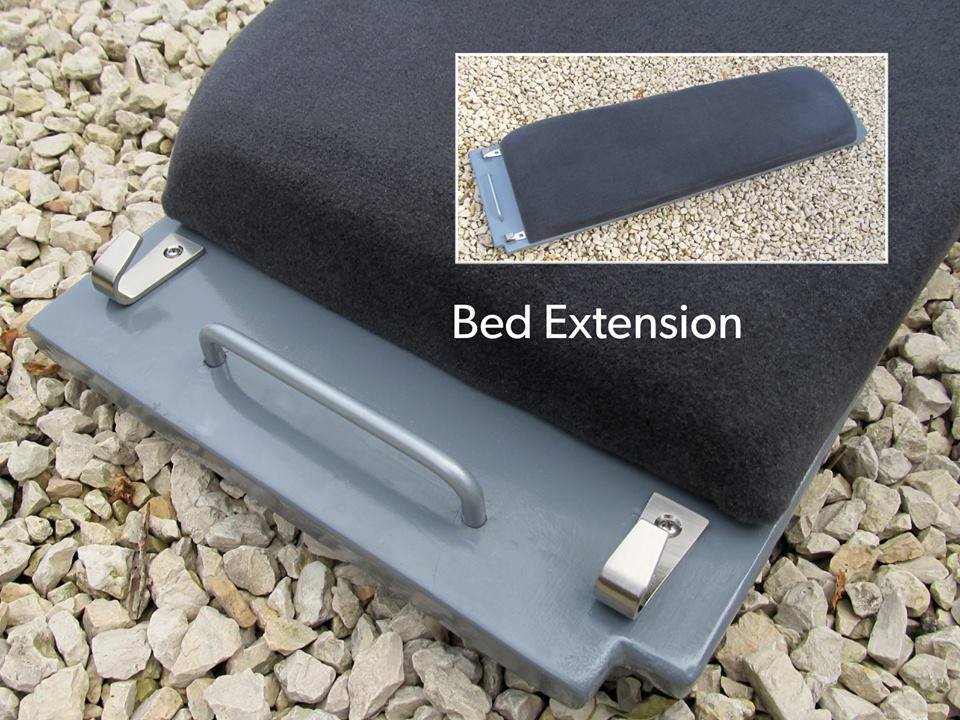
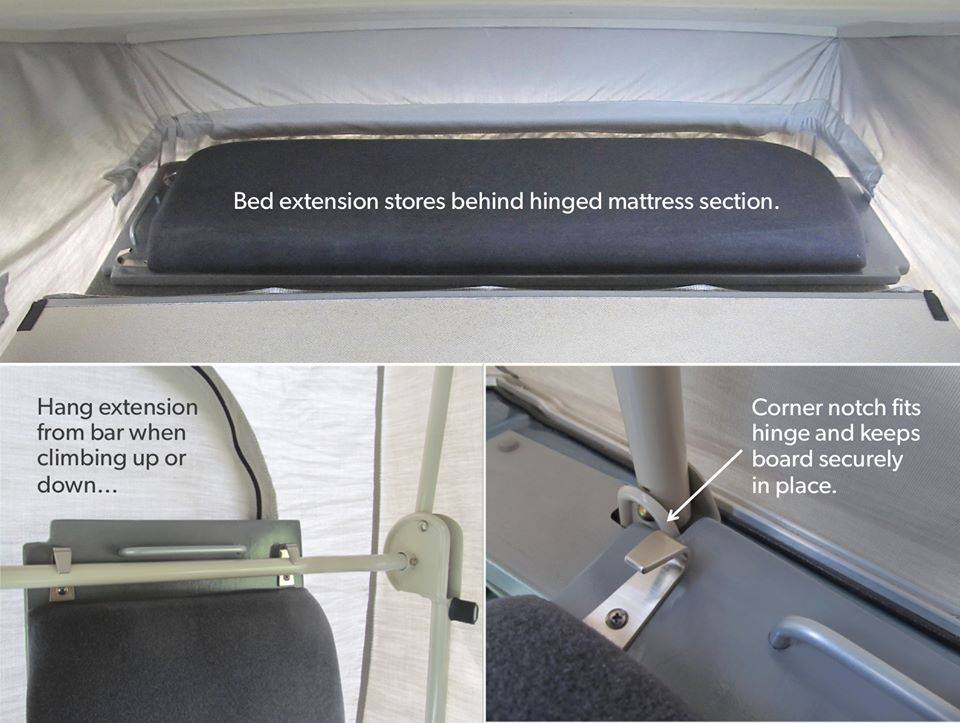
Mod by Robert Peters This is my bed extension, 'Bettie Blue' (1988 Vanagon)... I'm 6'-3" and this upper bed modification works like a dream. Props to "heliodon" (Samba member from Berkeley) for inspiring my hack (particularly the idea of hanging the bed extension from the poptop frame crossbar when climbing up or down). I purchased a piece of 48" x 11-1/2" x 3/4" "pine project panel" from a local DIY store, then notched two corners (to fit around the poptop hinges) painted and upholstered the board, and added two "U-hooks" and a handle... Here's a cheap way to add a few extra places to hang towels, clothes, etc. Simply remove your headrests, slide these on the posts and your done! 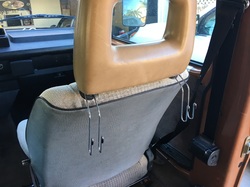 Mod submitted by Robert L. Peters Before heading to the Rockies for our annual climbing trip this summer, I wanted to add a "kill switch" — we were going to be deep in the back-country for a while with the van parked at a trailhead near the busy #1 Hwy. My goal was to have a discreet/hidden switch (accessible by the driver when seated at the wheel) that would immobilize the van. This can be flicked into “kill” position when leaving the van parked in a dodgy location (or activated quickly and discretely in the unhappy event of an attempted hi-jacking). Adding a switch to the fuel pump ground avoids interfering with the fuel pump power supply. (Pull off the spade connector for the fuel pump ground wire and leave it in place for possible later use. If any part of the kill-switch wiring ever gets cut or damaged, just pop off the new spade connector from the switch wire added to the pump and reconnect the original spade, about a 10 second process). 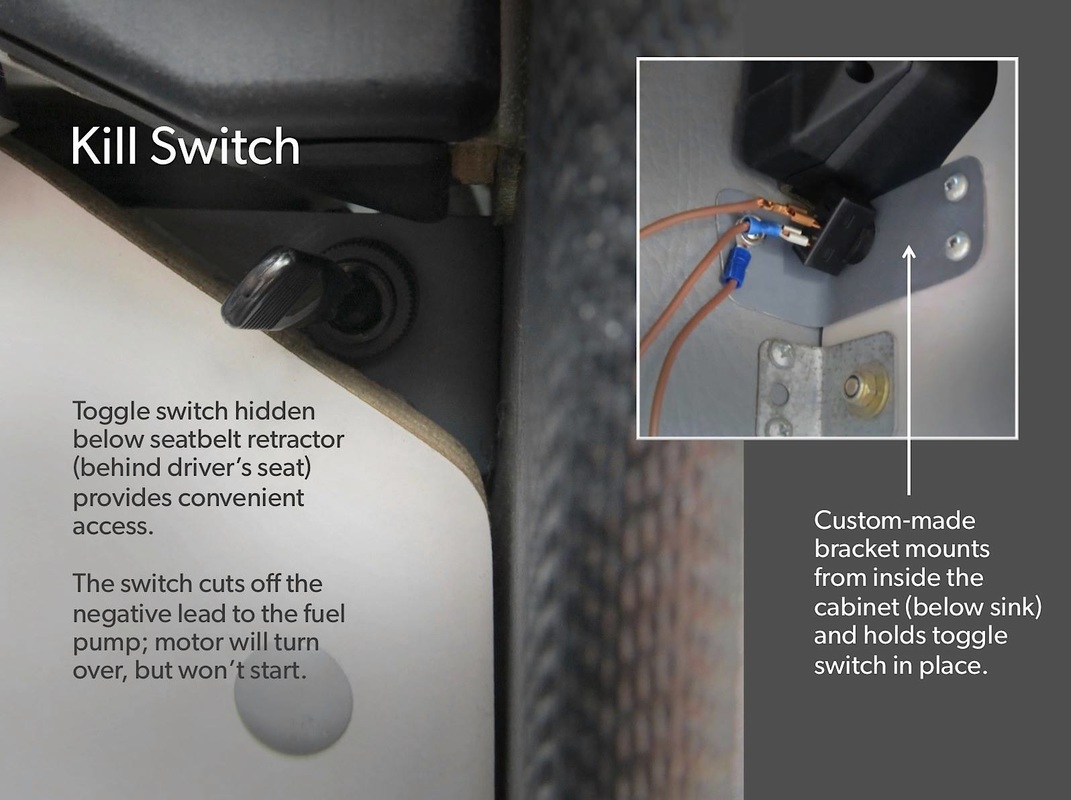 Mod submitted by Robert L. Peters 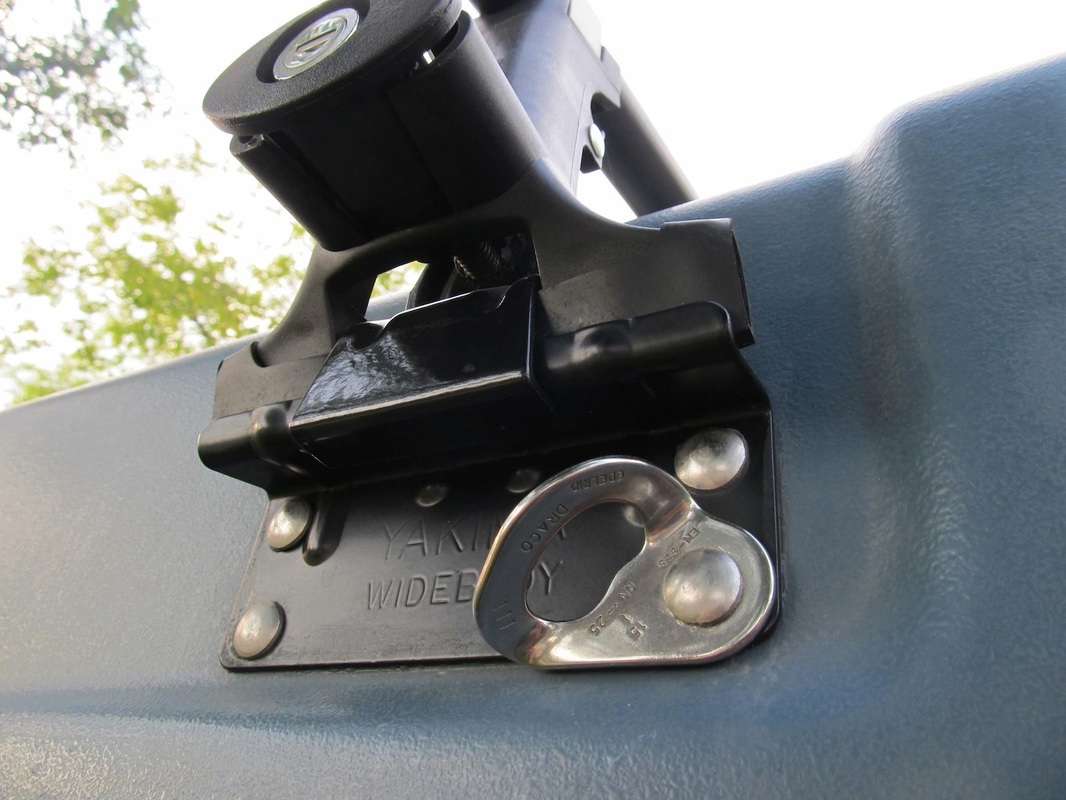 Mod submitted by Robert L. Peters An automatic battery charger plugged into the under-sink outlet for the refrigerator tops up the auxiliary battery (under the driver's seat) whenever we're plugged in to shore-power. 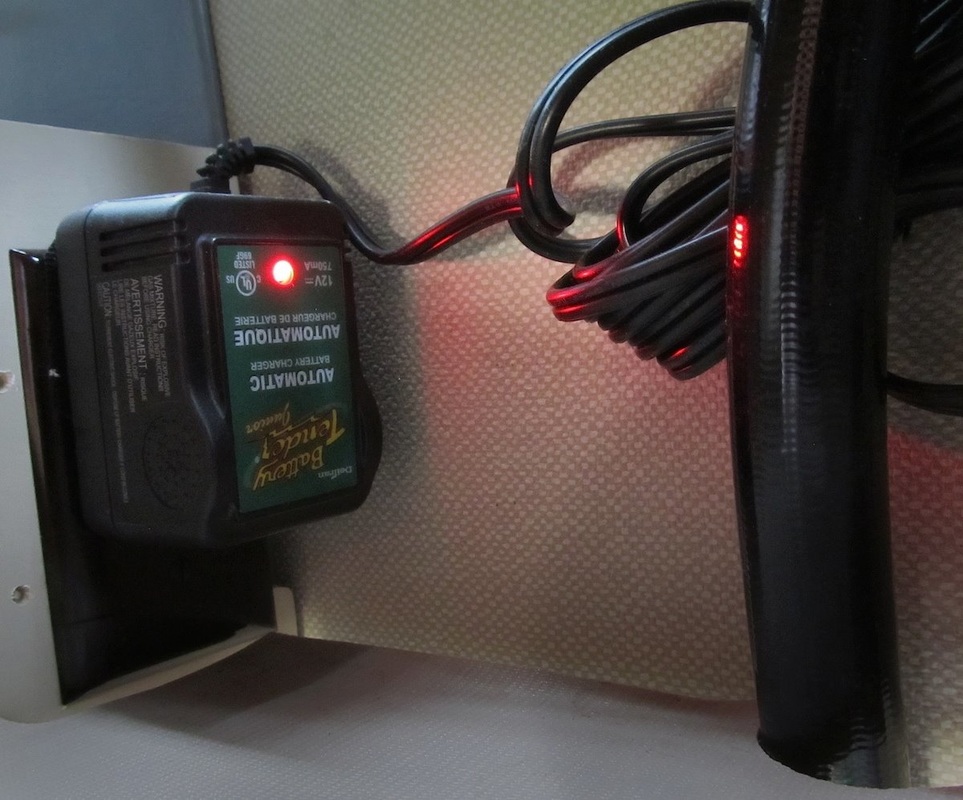 Mod submitted by Robert L. Peters A stainless steel cover (to replace the stock brown bakelite? one) helps clean up the shore-power outlet. 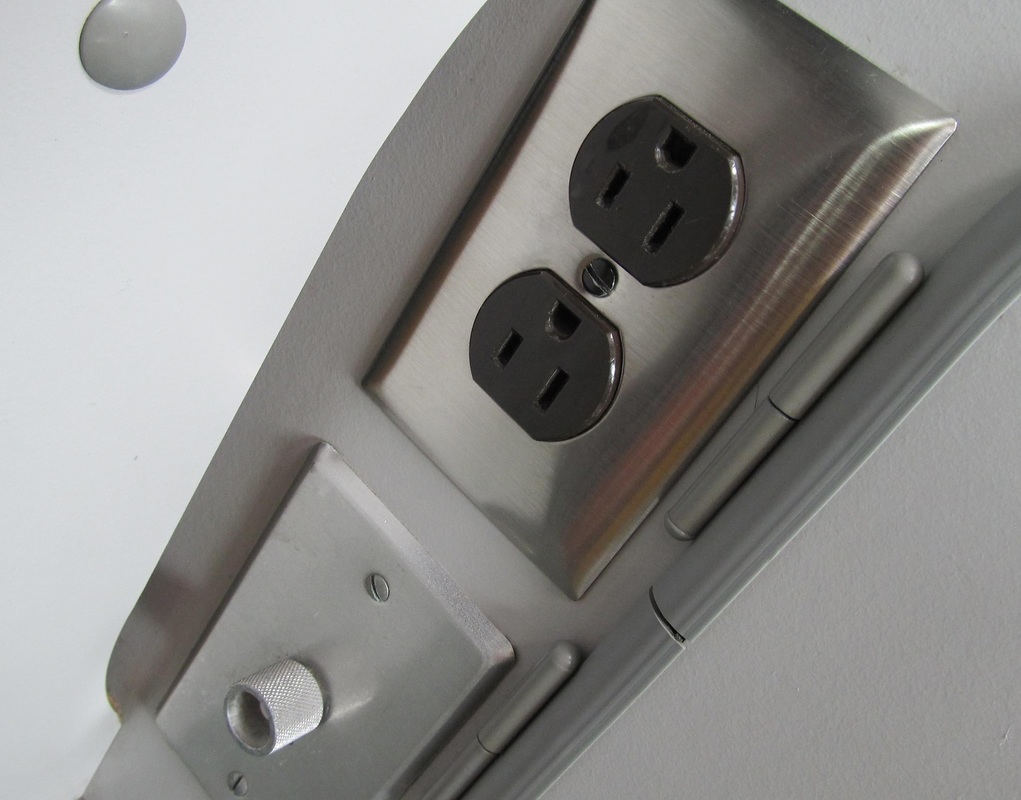 Mod submitted by Robert L. Peters I've seen some folks build elaborate shelves to attach to the top bar, but this stock item from IKEA is compact (collapsable) and handy... http://www.ikea.com/us/en/catalog/products/30219709/ 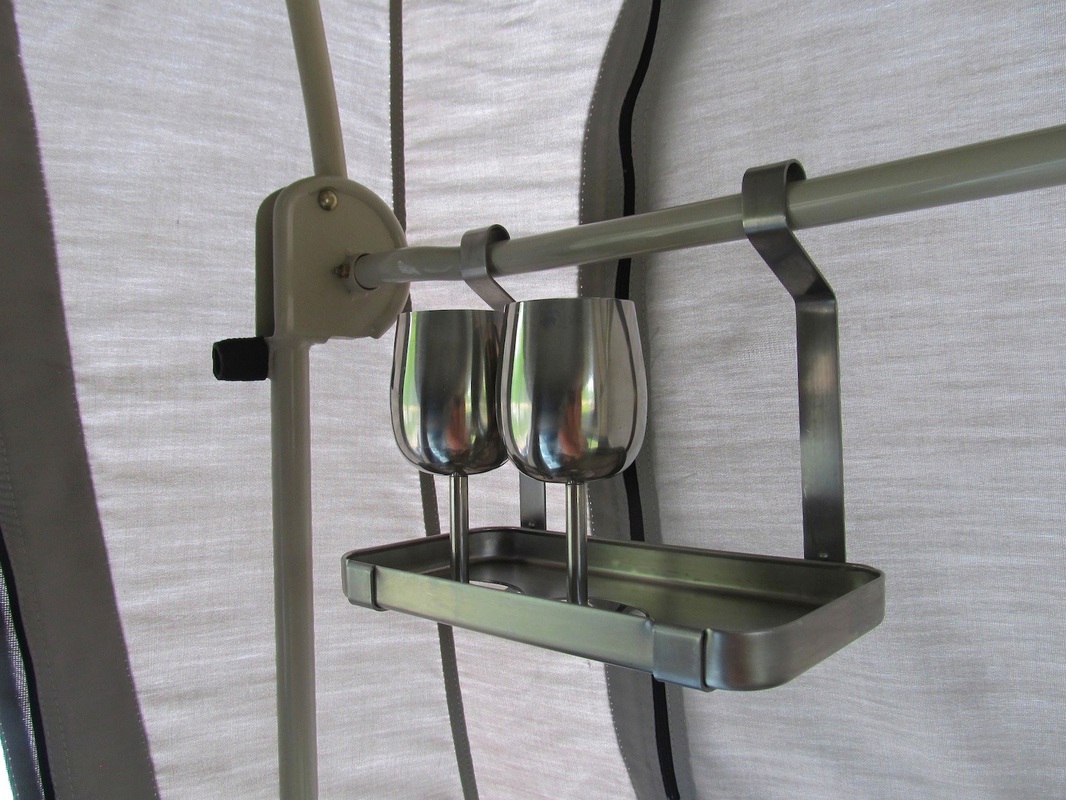 Mod submitted by Robert L. Peters We love these little LED clip-on lights (from Amazon) and have a half dozen in the van, some with magnetic holders like this... Pick up yours HERE 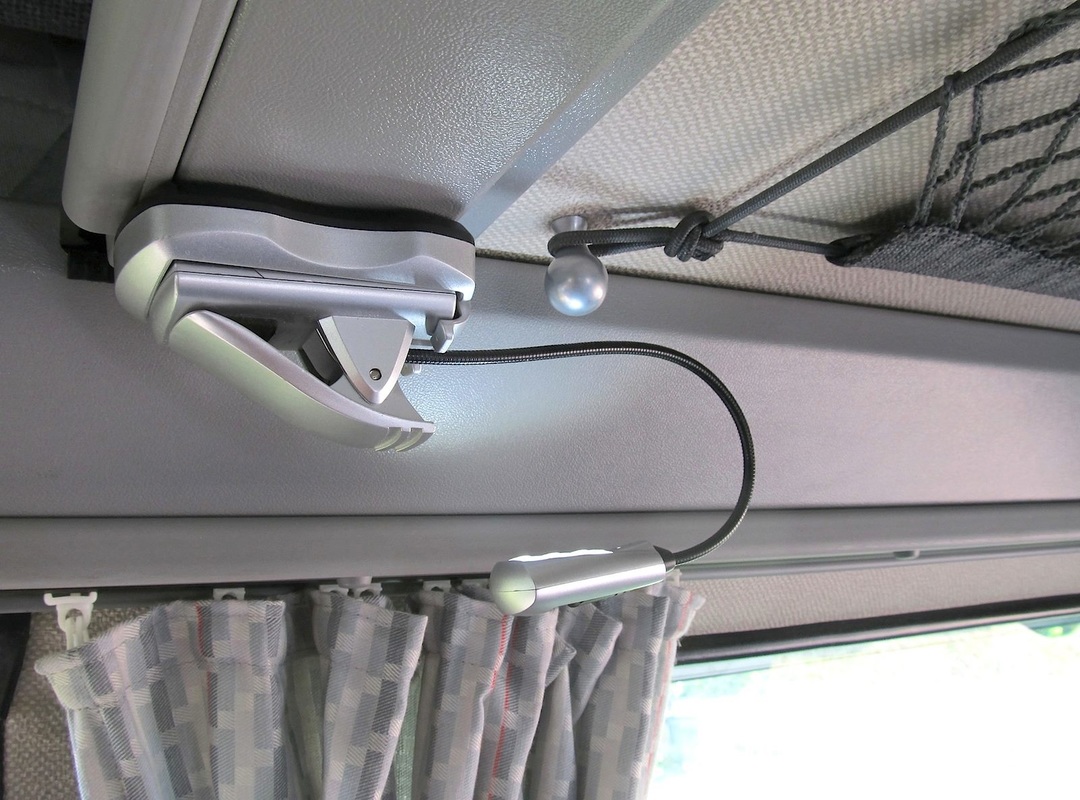 Mod submitted by Robert L. Peters "Top of house" looks like this... stretchy cargo net is convenient for lightweight "stuffables" such as down jackets and rain shells. 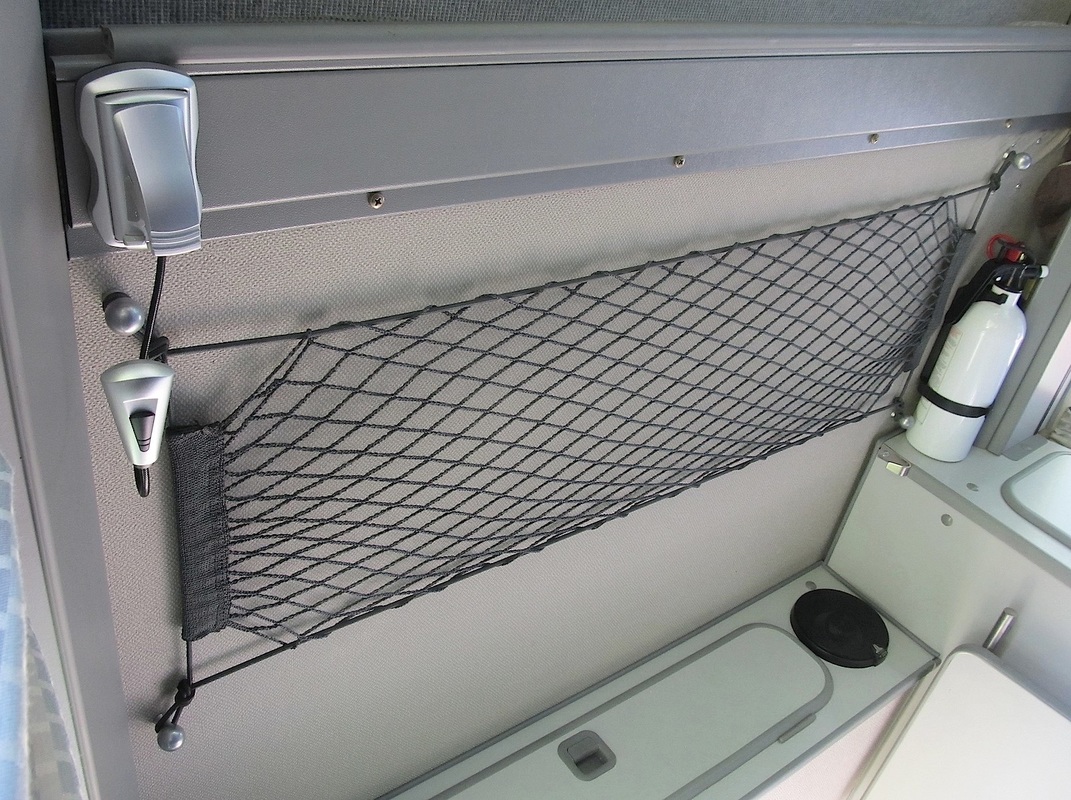 Mod submitted by Robert L. Peters Another simple hack was lengthening the post of the rearview mirror, improving the view behind the van... by cutting the post and pounding the two ends into a short piece of 1/2" copper (plumbing) pipe. 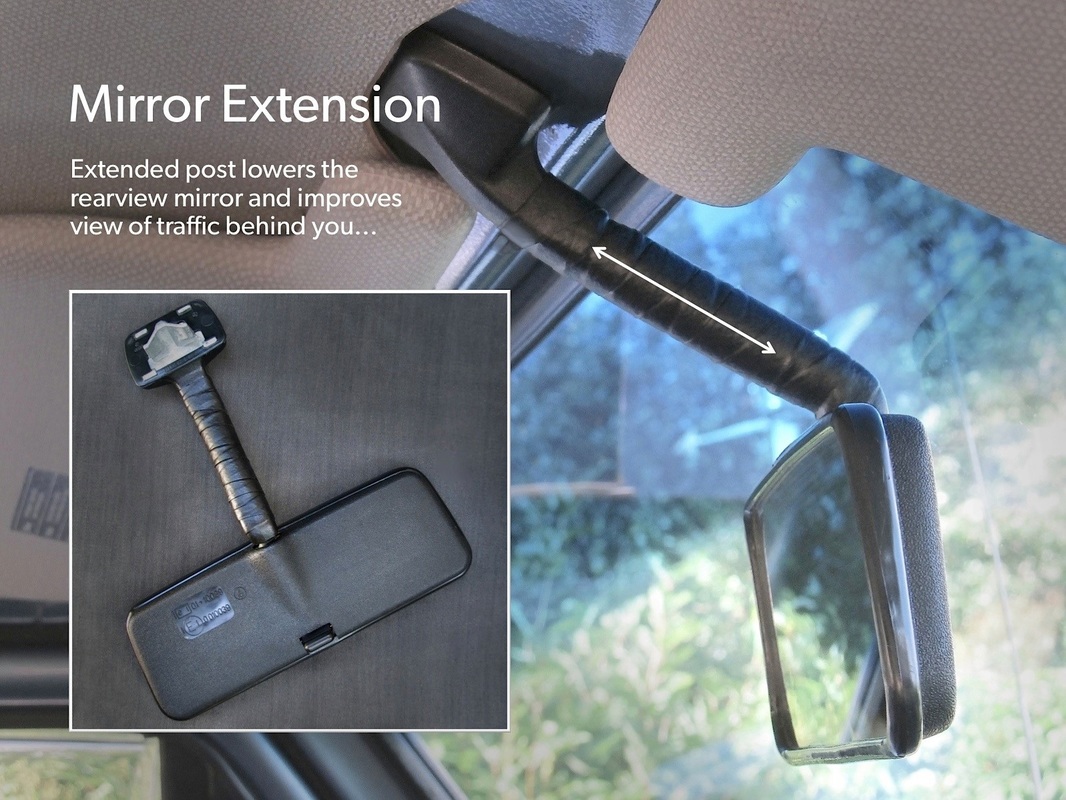 Mod submitted by Robert L. Peters When not in use, I hang the front tabletop from a stainless steel bar ("door pull" from IKEA mounted horizontally to the side cabinet wall behind the rear seat). The front table leg attaches to the forward side of the sink cabinet behind the driver's seat (rattle-free!), which still leaves lots of room for additional storage… e.g. for the front curtain, etc.
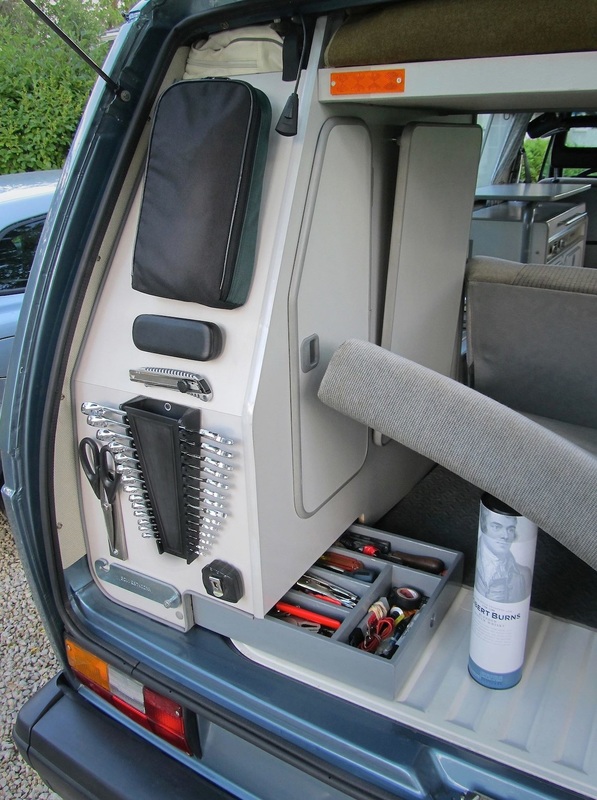
 I decided to use the space below the sliding door for some under-vehicle storage — a secure waterproof container for extra parts and tools, and the levelling blocks that have been taking up too much space in the luggage rack Mortar can contents " big crowbar, torque wrench, pipe extension, assorted hoses, grease gun with moly and needle nozzle, belts, pipe repair kit, water pump, fuel filter, small vice, hacksaw with extra blades, spark plugs, lots of assorted bolts, screws, clips, grommets, extra bulbs, wire, old shower curtain to use as a ground tarp, smooth and textured rags, gloves, etc... 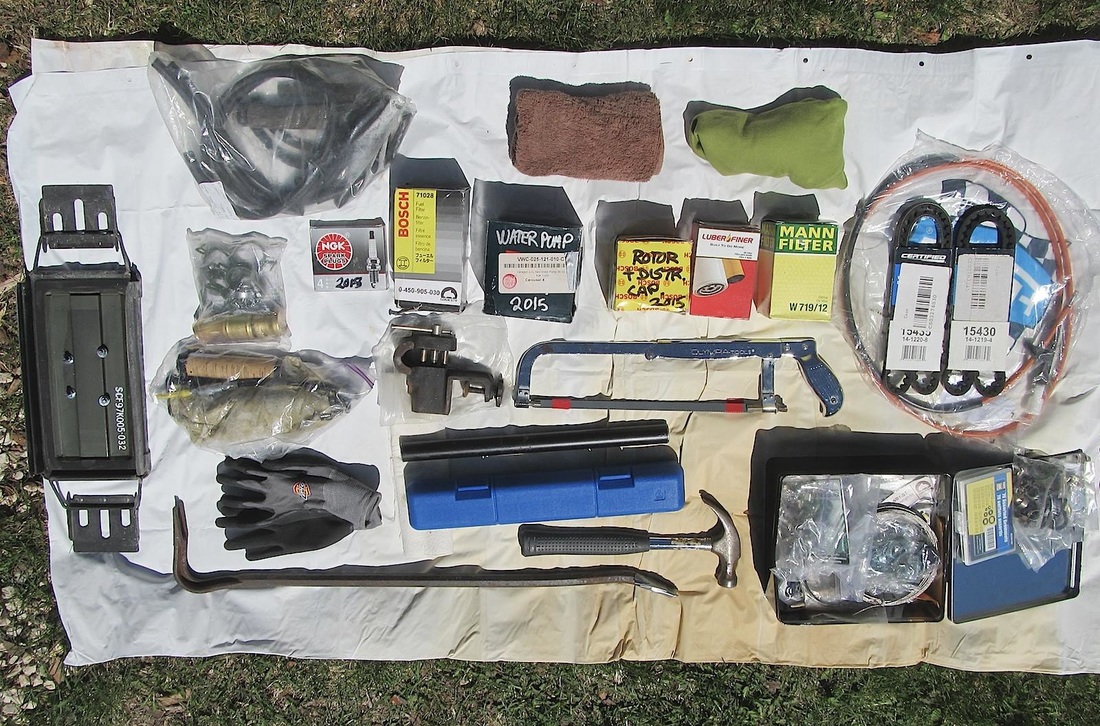 |